Starting the Application the First Time
The first time you start Gitora For Data (usually via http://yourdomain/gitorafordata/index.html) the login screen shows up. Enter the default username and password admin/admin and click the Sign In button.
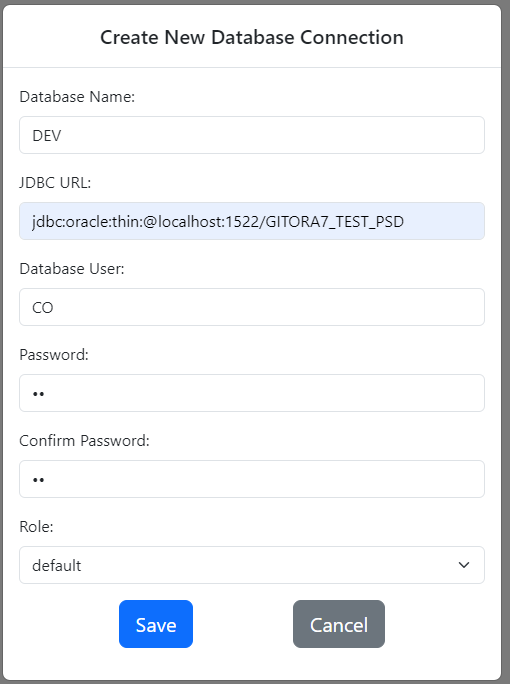
Since there are no databases registered to Gitora For Data yet, the Create New Database Connection Screen will show up.
Gitora will create database sessions using the credentials you enter on this screen so that it can query the tables and perform DML operations. Therefore it is important that the database user you enter has the necessary privileges to perform these tasks. You can add additional users to a database later but you need at least one.
Click the Save button to register your first database.
We will use the Oracle sample schema CO throughout this tutorial.
The Home Screen
Clicking the Save button takes you to the Home Screen.
The Home Screen is used for the following functions:
- Search, register, edit and unregister databases from Gitora.
- Create, clone, delete, search and open repos.
- Create, edit and delete database users.
- Search, create, edit and delete Gitora For Data application users.
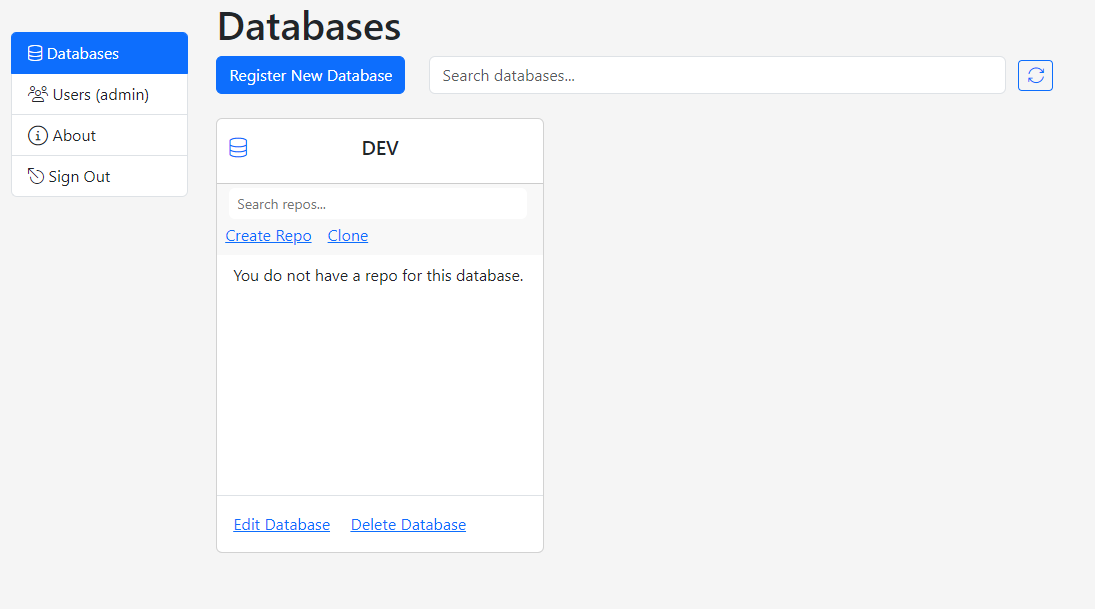
The Home Screen consists of two sections. The navigation column and the main area.
By default, the home screen starts with the Databases tab which lists all the databases that are registered to Gitora.
Creating Your First Repo
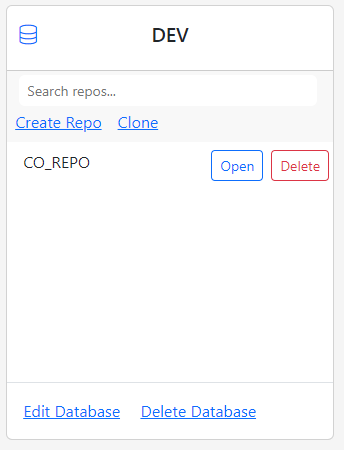
In Gitora For Data, each registered database is represented with a Database Card on the home screen. The database card can be used to edit and delete a database as well as to search, create, clone, delete and open Git repos associated with the database.
Our first database does not have a repo yet. So let’s create one.
Click the Create Repo link in the DEV database card. The Create Repo dialog shows up.
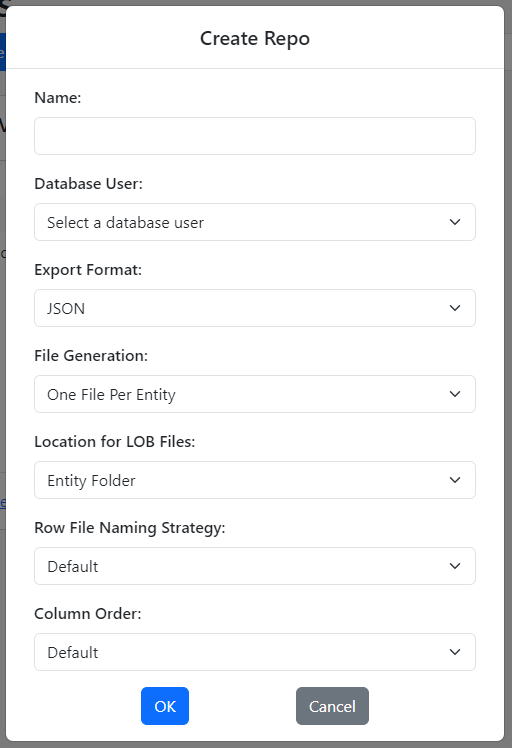
The dialog displays several fields. Let’s go over them one by one:
Name: This is the name of your repo. It will be the name of the top folder of your Git repo where the .git folder resides.
Database User: Gitora needs to know which database user this repo will connect to so that it can query data from the DEV database.
Export Format: Select the notation the exported data is represented in. (Currently, JSON format is supported. More options will be added based on customer feedback.)
File Generation: Gitora can generate file or files for the rows in a table using the following output strategies:
a) One File Per Entity
Using this strategy, Gitora will create one JSON file that contains all the rows in the table. For example, if you want to export the data from the EMPLOYEES table, Gitora will create a file at EMPLOYEES/EMPLOYEES.json and store all the rows in the EMPLOYEES table in this file.
b) One File Per Row
Using this strategy, Gitora will create a new JSON file for each row in the table. For example, for the table EMPLOYEES it will create files like so: EMPLOYEES/row_0.json, EMPLOYEES/row_1.json, EMPLOYEES/row_2.json etc…
c) One Folder Per Row
Using this strategy, Gitora will create one folder for each row like so: EMPLOYEES/row_0/row.json, EMPLOYEES/row_1/row.json. This option is more suitable if your tables contain LOB columns. For example, if the EMPLOYEES table contained a column named PICTURE_BL, the output would look like the following: EMPLOYEES/row_0/row.json, EMPLOYEES/row_0/PICTURE_BL.png.
Location for LOB Files: Gitora can export LOB data to files. You can choose one of the following options to create the files for LOBs.
a) Entity Folder
Gitora will create the LOB files under the entity folder which is usually named after the table. For example, files for LOB data in the EMPLOYEES table will be created under the EMPLOYEES folder in the repository like so: EMPLOYEES/row_0_PICTURE_BL.png, EMPLOYEES/row_1_PICTURE_BL.png etc…
b) Subfolder under Entity Folder
Gitora will create the LOB files under the lobs directory of each entity. For example the file structure under the EMPLOYEES folder will look like the following: EMPLOYEES/lobs/row_0_PICTURE_BL.png, EMPLOYEES/lobs/row_1_PICTURE_BL.png
c) One Folder Per Row
Gitora will create a folder for each row and place the LOB files of the row under it like so:
EMPLOYEES/row_0/PICTURE_BL.png
EMPLOYEES/row_1/PICTURE_BL.png
Note that, this option can be used in conjunction with the File Generation strategy One File Per Entity. In this case, all rows of the EMPLOYEES table will be in the EMPLOYEES/EMPLOYEES.json file and the files for LOBs will be in folders generated for each row: EMPLOYEES/row_0/PICTURE_BL.png, EMPLOYEES/row_1/PICTURE_BL.png etc…
Row File Naming Strategy: This option determines the strategy Gitora uses to name the files Gitora creates for each row. Gitora can create a file for each row and/or a file for each LOB column in the row. Gitora will use the selected strategy whenever it creates these files.
a) Default
The Default strategy assigns a number to each row starting from 0. The rows are numbered in the order they are received from the Entity’s SQL query. Therefore, it is important to order the data by a column (or columns) that do not change their value over time. By default, Gitora orders rows by their primary key column value(s). If the table does not have a primary key constraint, Gitora uses the first column in the Entity query like so: select * from table order by 1
b) From Primary Key
Gitora generates row file names using the primary key column value(s) of the table. Assuming the primary key of the COUNTRIES table is NAME_TX, the rows Gitora generates will be: COUNTRIES/row_USA.json, COUNTRIES/row_GERMANY.json etc…
Please note that, the primary key values must not contain any characters that cannot be used in file names.
Column Order: Specify the order in which the table columns appear in the JSON document.
a) Default
The columns are ordered as they appear in the SQL query of the Entity. For example, if the query for the COUNTRIES entity is “select region, name from countries” then the JSON document for the country USA will look as follows:
{“region”:”North America”, “name”:”USA”}
b) Alphabetically
As the name of the option suggests, the columns will be ordered alphabetically in the JSON document. For the same query as above, the JSON document will be as follows:
{“name”:”USA”, “region”:”North America”}
Below are the values for each field for our first repo:
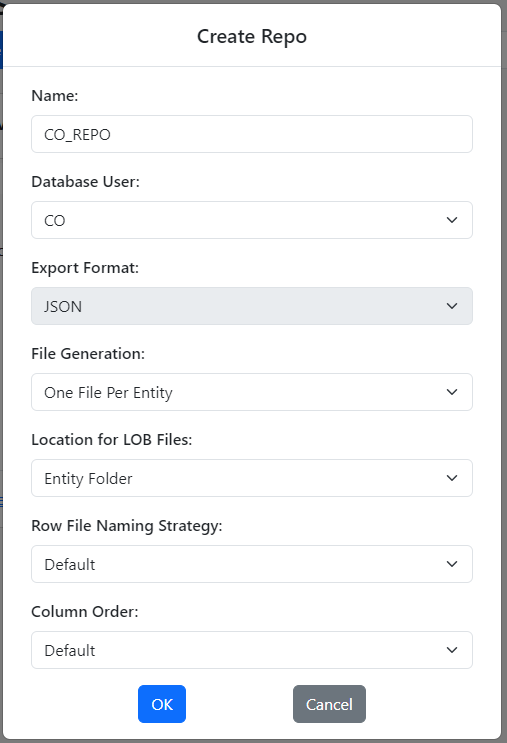
Click OK to create your first repo.
The database card for DEV database shows the first repo you created.
Working with a Repo
Clicking the Open button opens a new browser tab and takes you to the Repo App where the actual stuff happens. Therefore, the repo maintenance deserves its own tutorial. Click here to learn how you can edit a repo, export data to a repo, perform Git operations on the data and finally import your data back to a database.
Deleting a Repo
Click the red Delete button next to a repo to remove it and its contents. Select Yes to confirm and your repo will be deleted.
Cloning a Repo
The Clone button in the Database Card clones a repo and associates the clone with a database.
Although you can clone a repo and associate the clone to the same database, it makes more sense to clone a repo and associate it to a new database. This is how you can move your data from one database to another using Gitora For Data.
To achieve this, let’s create another database first.
Click the Register New Database button and repeat the steps you followed to register your first database. It goes without saying that you should use a different name and JDBC connection string for the new database.

Click the Clone button under the TEST Database Card. The Clone Repo dialog shows up.
Fill out the fields as follows:
Name: Enter a name for your new repo. Since we are cloning the CO_REPO repo, it makes sense to name this repo CO_REPO as well.
Database User: Specify the database user Gitora should use to perform export/import functions for this repo. Since this repo manages data in the CO user, it makes sense to select the CO user.
Clone From Database: We want to clone the CO_REPO from the DEV database to the TEST database, so select the DEV database in this select box.
Original Repo: Select the repo you want to clone from the DEV database. In our case, this is the CO_REPO.
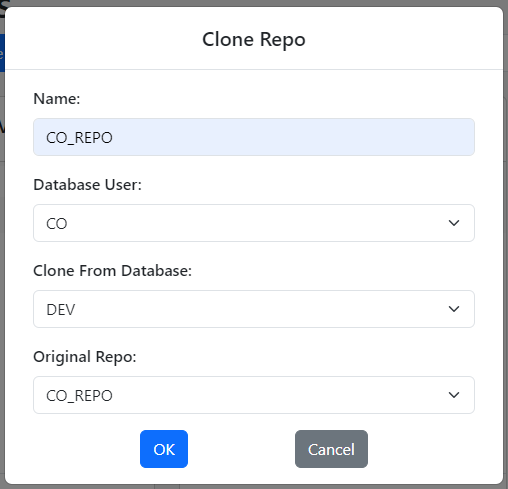
Click the OK button to clone the repo.
The TEST database card shows the cloned repo.

Unregistering a Database
Click the Delete Database button on a database card and select Yes to confirm to remove the database and all its associated repos from Gitora For Data.
Editing a Registered Database and Its Users
Click the Edit Database button on the database card. The Edit Database screen shows up.
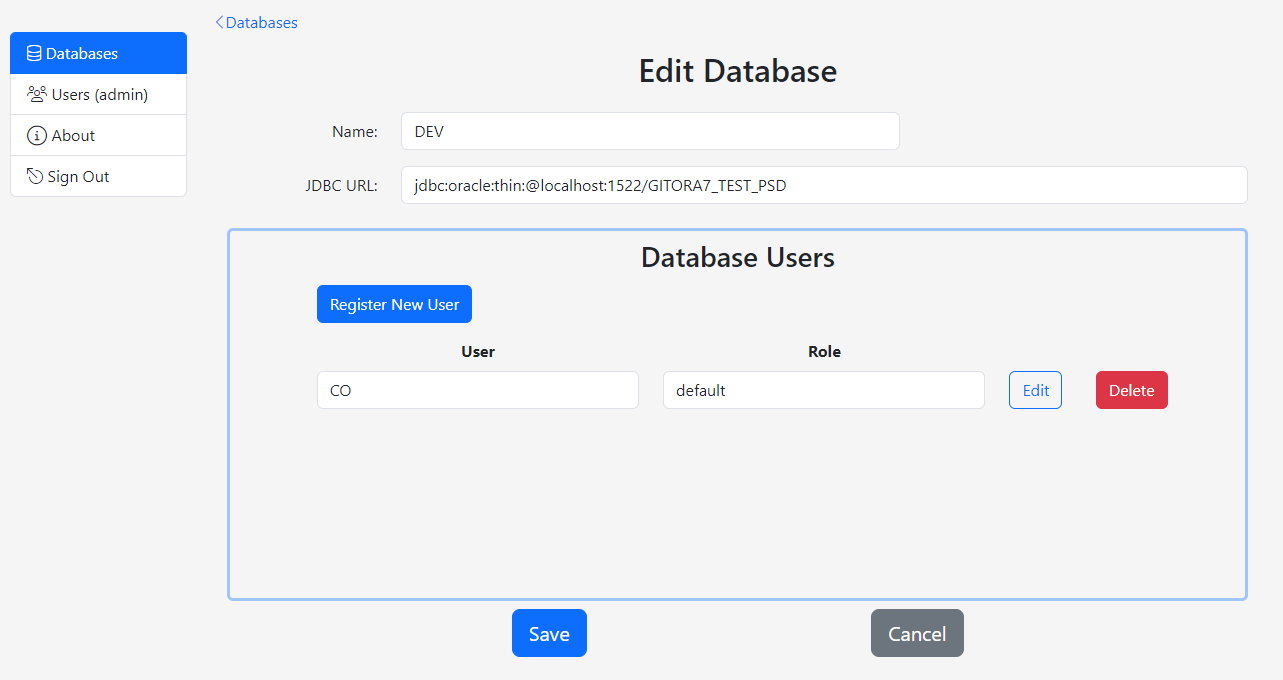
Use this screen to edit the database name and the JDBC URL to connect to the database.
Use the Register New User button to add additional credentials to connect to the database. Use the Edit and Delete buttons to update and remove the existing credentials respectively.
Working With Gitora For Data Users
Click the Users tab to work with the application users.
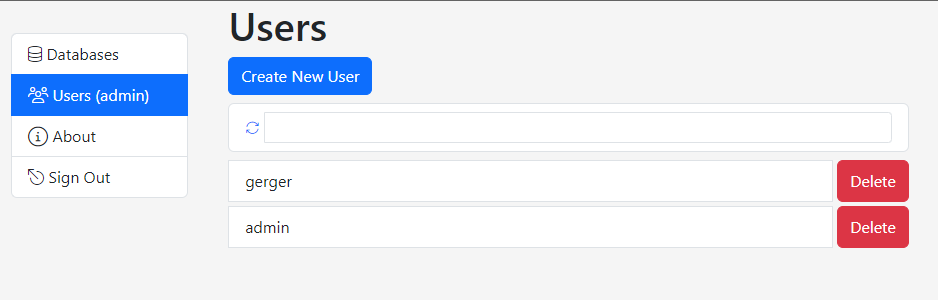
Use the Create New User and Delete buttons to add or remove a user respectively. Click on a user to change its password.
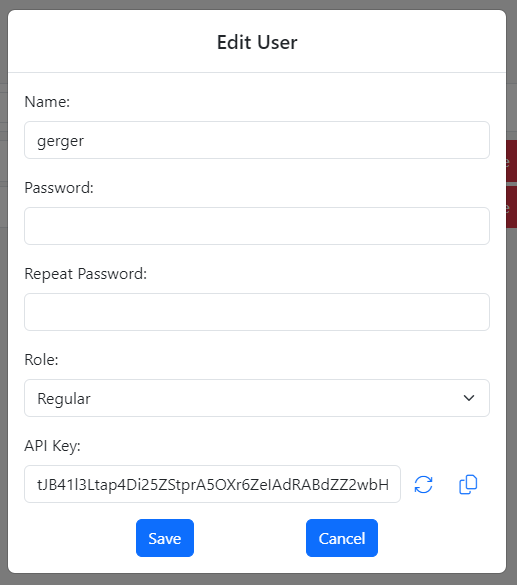
Generating and Using API Keys to work with the Gitora For Data API
The Edit User screen is also where you can generate and update a user’s API key. You need a valid API key to be able to work with the Gitora For Data API.
Click the refresh button to generate a new API key. Generating a new key, invalidates the existing key of the user. Click the copy button to copy the key to your clipboard.