We are thrilled to announce the release of a brand new app: Gitora For Data.
Gitora For Data seamlessly integrates data in your tables with Git, enabling robust version control. Utilize any Git command for collaboration and effortlessly import any dataset version back into your chosen database. Gitora For Data is ideal for versioning metadata, business logic, Large Objects (LOBs), and value lists in your tables.
A Solution for Database Centric Applications
Many teams in the Oracle database community build database centric applications where most of the business logic, code, settings, workflows and even user interfaces are stored in the database tables. This has great benefits but it comes at a great cost: Lack of version control. Deprived of version control, database teams struggle to collaborate. Having two people working on the same application becomes a daunting task, a trivial undertaking for middle tier and web developers. Deploying changes from the development database to production fairs no better. A missing row in a table, a forgotten CLOB update causes havoc. Gitora For Data is our first attempt to provide a solution to these shortcomings.
Database centric application development is an area with a lot idiosyncratic implementations and no real industry wide standards. Accommodating the wide range of requirements may take additional features. We are looking forward to hearing from you. We fully anticipate that there will be unique needs and Gitora For Data application architecture is flexible enough to support a wide variety of requirements.
In this tutorial, we will add every table in the Oracle sample schema CO to the CO_REPO, extract the data in the tables, make some modifications to them, issue a git commit and import the data into another database.
Clicking the open button next to the repo in the Home Screen opens the Repo App in a new browser tab.
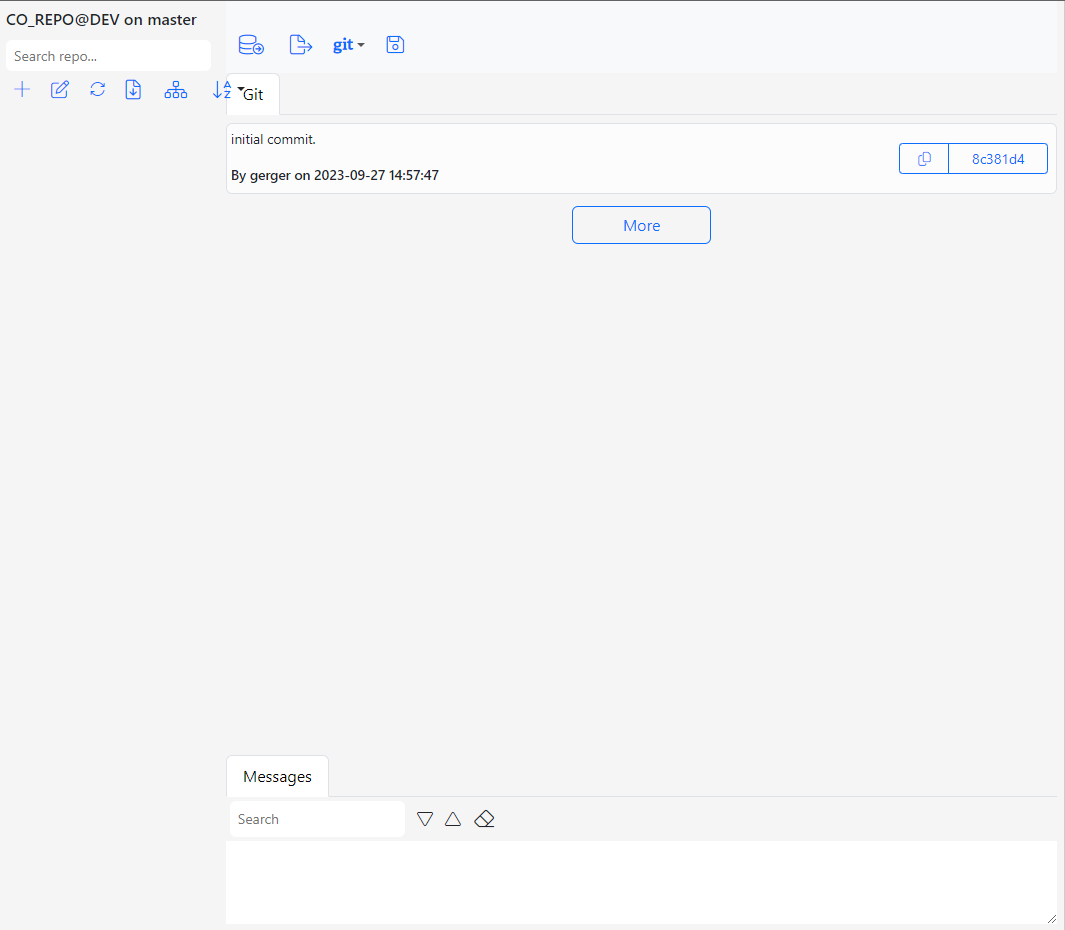
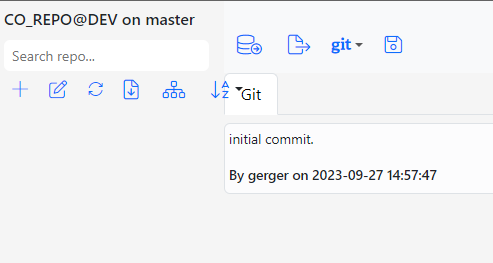
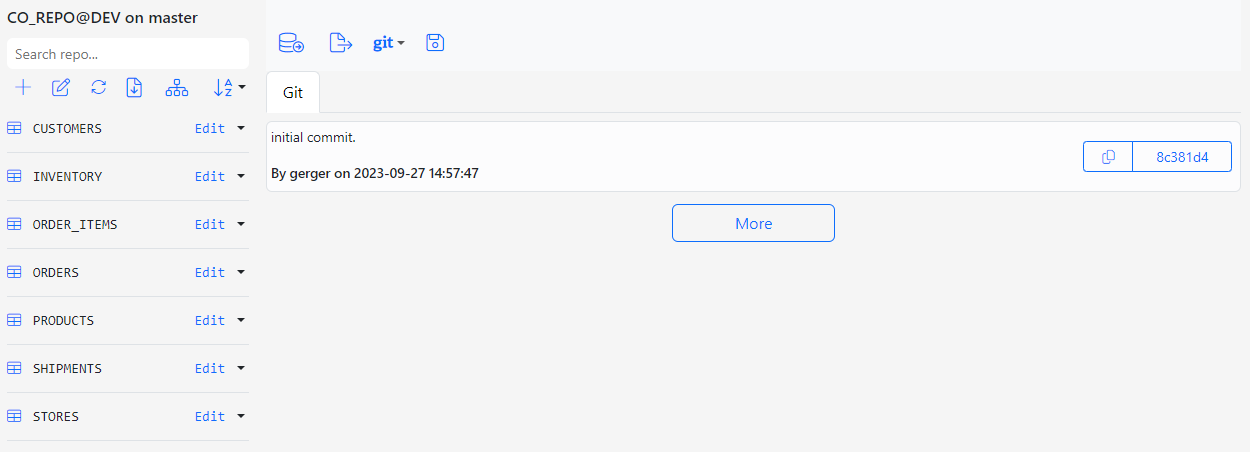
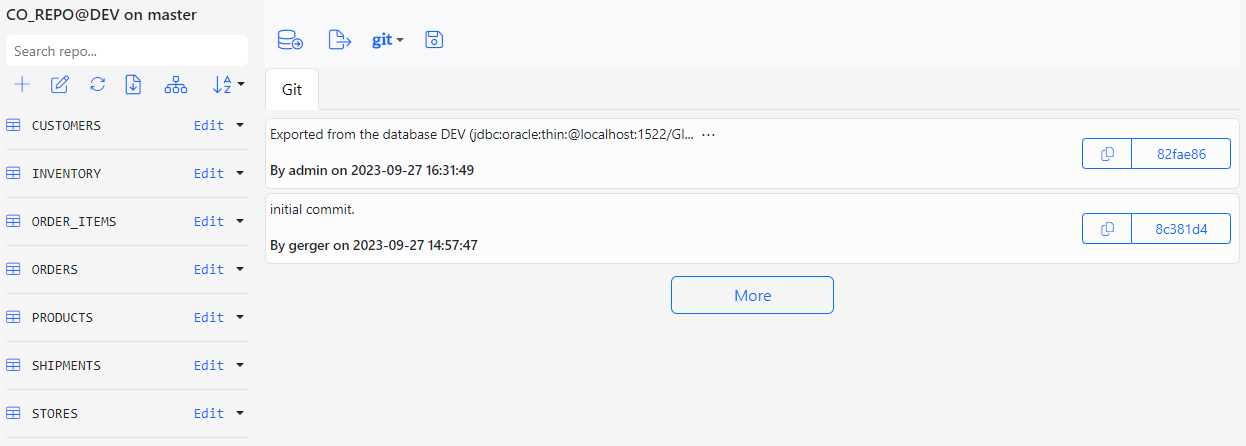
Below is the screenshot of the CO_REPO in its initial state.
At its initial state, the repo CO_REPO is empty and there is only the initial commit that stored the initial Gitora configuration file.
Following tutorials will focus on other git features such as branching, merging etc…
Creating Entities
To add tables to the repo, click the plus sign on the left of the screen titled under the repo search field.
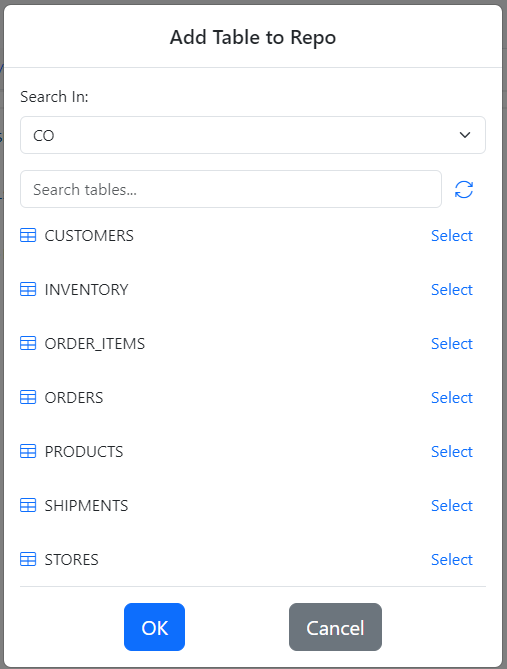
The Add Table to repo dialog shows up.
Select every table by clicking the Select button next to each table. Finally, click OK. Gitora will create an “Entity” for each database table. In Gitora parlance, an Entity is an SQL query with a target table. Gitora for Data can export and import entities.
Our repo looks much better now with seven entities.
We’ll talk about entities and what you can do with them in another tutorial. For the purposes of this tutorial, we are ready to export the data out of the CO schema in the DEV database.
Exporting Data to the Git Repo
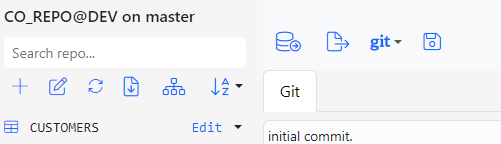
Click the Export button which is the first button from the left, at the top of the screen.
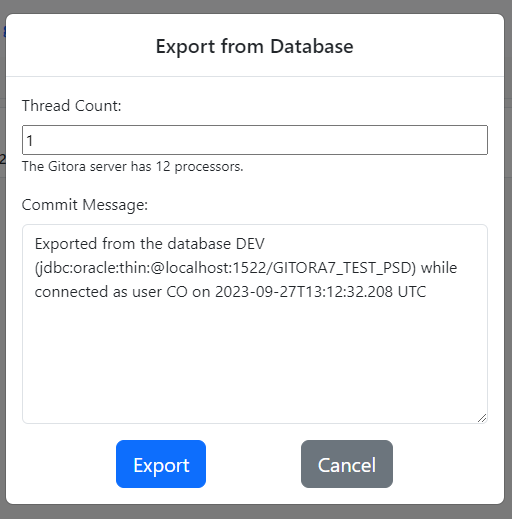
The Export dialog shows up.
Gitora can export the data in multiple threads in parallel. Gitora displays the number of processors in your server. We recommend picking a number below the processor count as the number of threads to be used for export.
Finally, Gitora adds and commits the generated files to Git. The more files there are the longer this process takes, although JGit is surprisingly fast at adding and committing files.
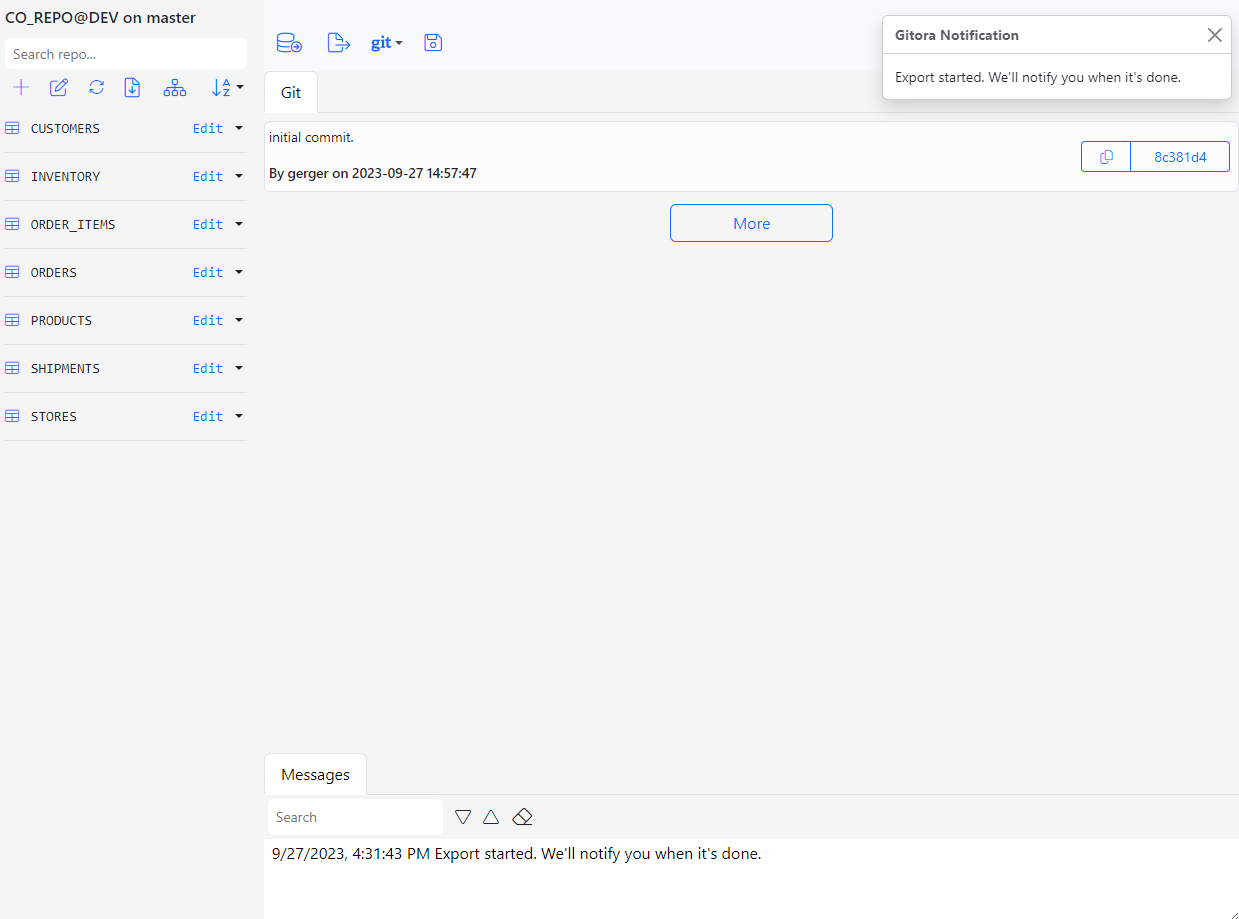
Enter a Commit Message and click the Export button. A notification will slide in from the right side of the screen, informing you that the export has begun and Gitora will inform you once it is completed. The same message is also displayed in the Messages tab at the bottom of the screen.
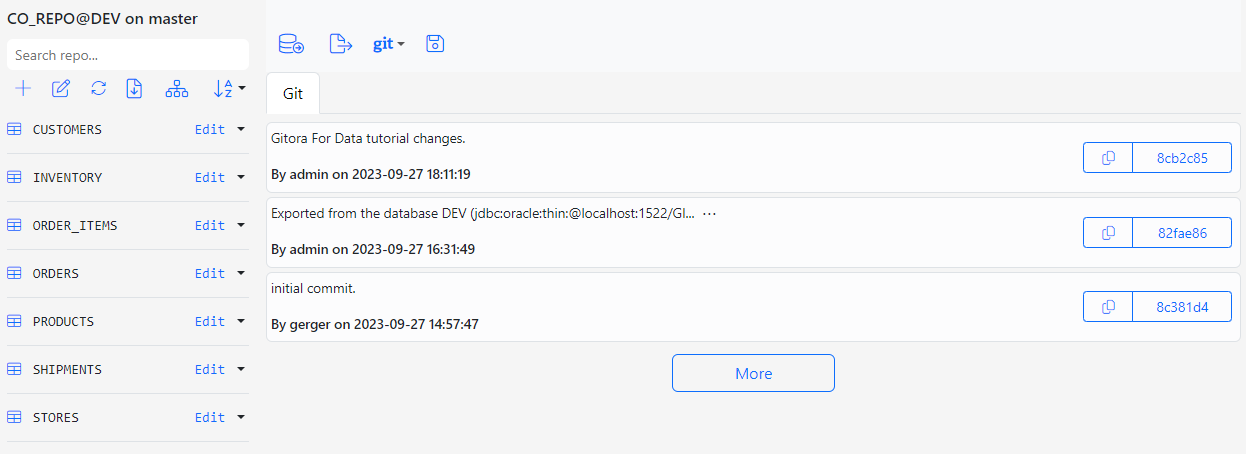
After a short while you will receive a second notification that informing you that the export is completed. The Message tab will also display the same message. The Git tab in the middle of the screen will show the new commit created by the export.
A Word On Export Speed
Gitora is not tested with large datasets and the goal of the product is not to support millions of rows. The CO schema has 8783 rows and Gitora exports the data quickly. Please note that the number of files generated by Gitora can change significantly depending on the File Generation Strategy you choose and the number of LOB columns the tables have.
Browsing the Exported Data
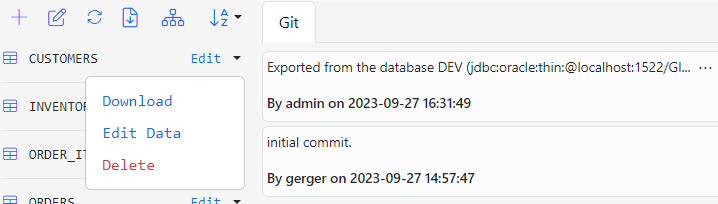
Click on the entity names or open the button group for each entity and select Edit Data to browse the generated JSON files.
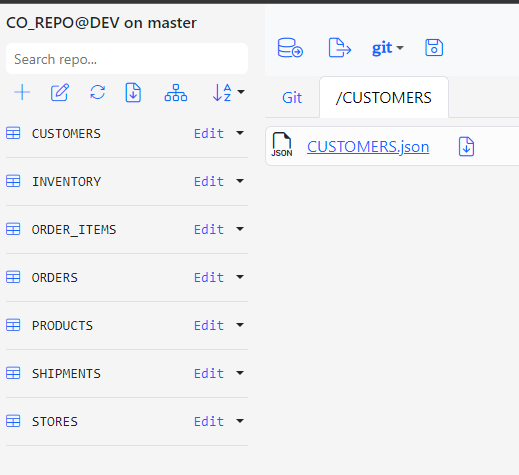
In the screenshot below, we clicked the CUSTOMERS entity to view the contents of the CUSTOMERS folder in the repo’s working directory.
Editing the JSON Documents
To edit the document, click the CUSTOMERS.json link. Click the download icon next to it to download the JSON file.
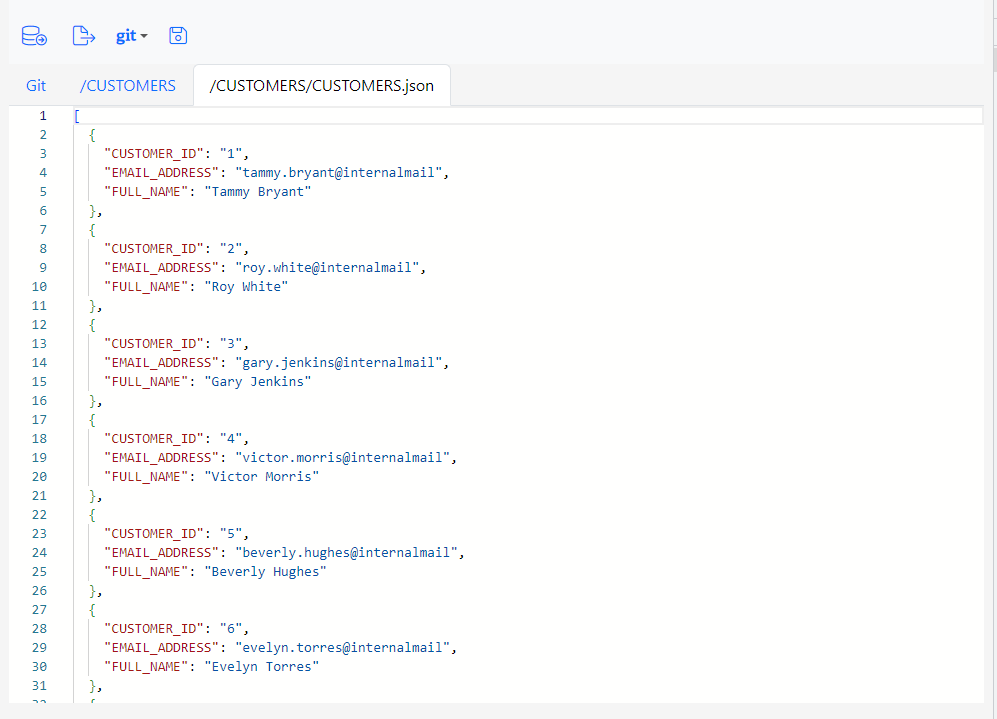
Gitora displays the data in a JSON editor that formats the document properly. Gitora also enforces the JSON syntax for the document. Trying to save the document with a JSON syntax error will cause an error.
For the purposes of this tutorial, change the name of the first customer to John Doe.
Click the Save button at the top menu to save your changes.
Viewing the LOB files
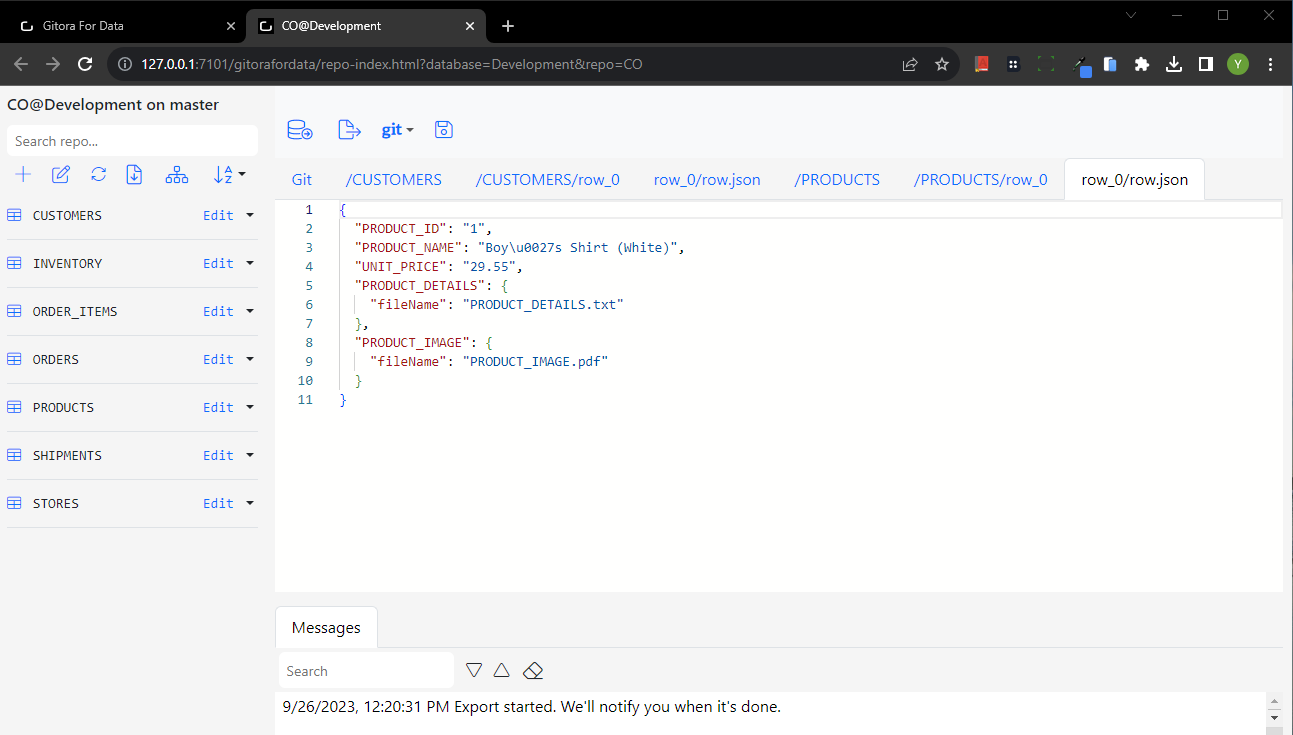
Click the PRODUCTS entity to view the data Gitora exported for products.
The PRODUCTS table contains a CLOB and a BLOB column named PRODUCT_DETAILS and PRODUCT_IMAGE respectively. The PRODUCTS folder contains the files generated for these LOB columns.
As with the JSON documents, you can view the LOB files in the browser (if it is a file type that can be viewed in a browser) or download them.
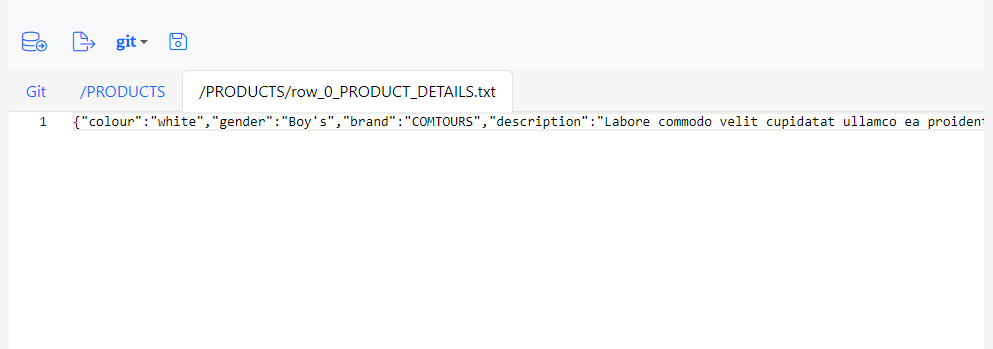
To view a CLOB file click on the row_o_PRODUCT_DETAILS.txt link. Gitora opens a plain text editor.
The text data stored in the PRODUCT_DETAILS column happens to be a JSON file (which is confusing for the purposes of this tutorial) but let’s ignore that for a moment. Stored in a CLOB, it could be any kind text data that we are viewing. Since the data is plain text, you can edit it within the Gitora for Data application and save your changes just like you would with a JSON file. Make a change to the file and click save.
To view a BLOB file, either click on the link for the file to view it in the browser or click the download button next to the link to download it.
Unfortunately, the original PRODUCTS table in the Oracle sample schema CO does not contain any BLOB data but we’ve added one for this tutorial.
Clicking the link row_0_PRODUCT_IMAGE.pdf will open the PDF file stored in this file in the browser.
Note that, Gitora can figure out common file types of BLOB data such as PDF’s, PNG’s JPEG’s etc… , automatically.
Committing the Changes
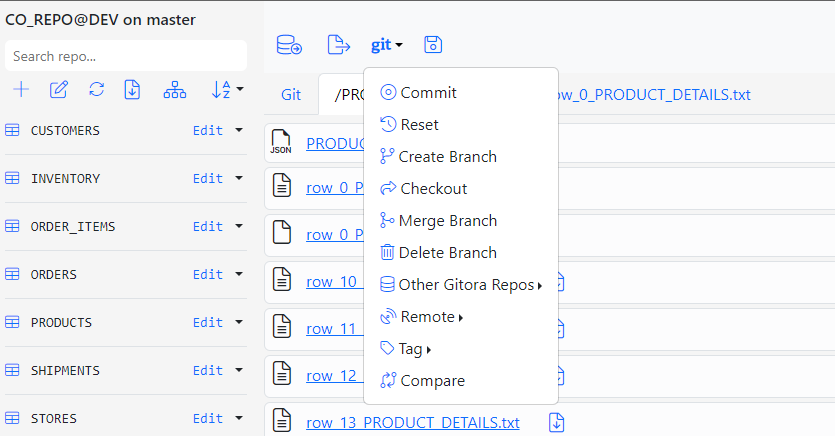
Committing the changes we made to Git is a straightforward git commit. Click the menu item named git at the top of the application and select Commit.
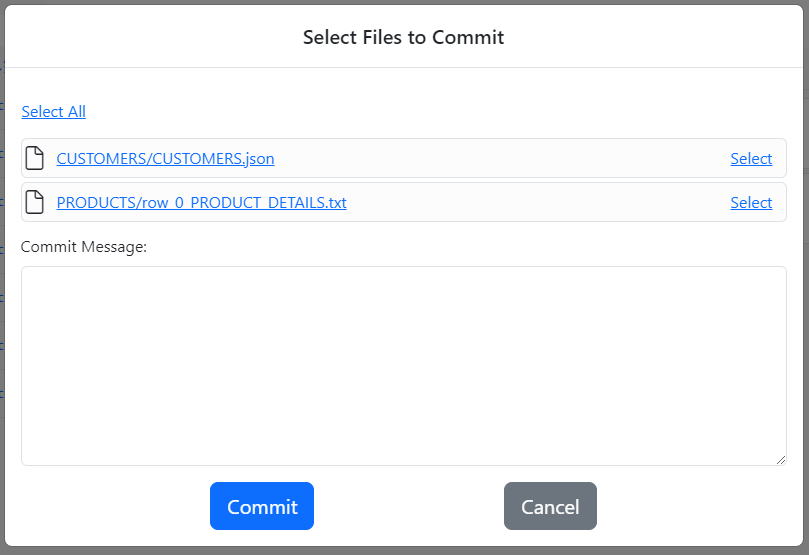
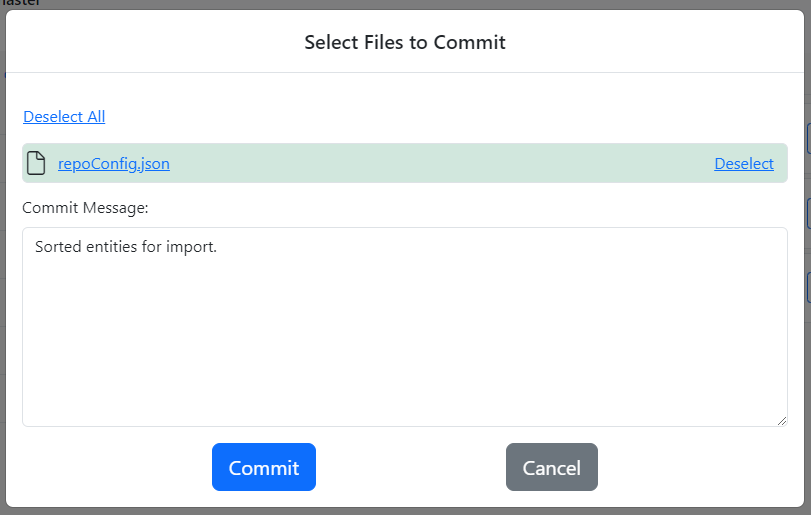
The Commit dialog shows up.
The Commit dialog lists the changed files that can be committed to the repo. Click the name of the file to open the diff editor in a new browser tab that highlights the changes made to the file since the last commit.
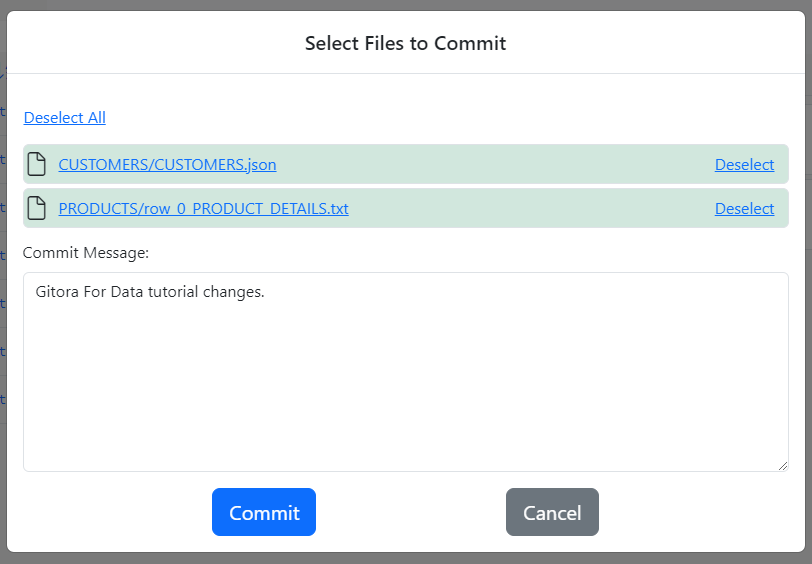
Select the files by either clicking Select All or by clicking the Select link for each file. Enter a short explanation to the Commit Message field and click the Commit button.
Clicking the Commit button closes the dialog and refreshes the Git tab to display your latest commit.
Ordering Entities for Import
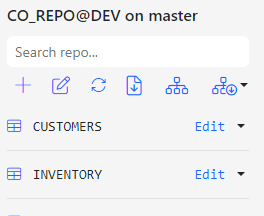
Gitora For Data allows you to set an import order for entities. Click the icon that looks like a hierarchy in the repo menu bar, the second icon from the right among the icons.
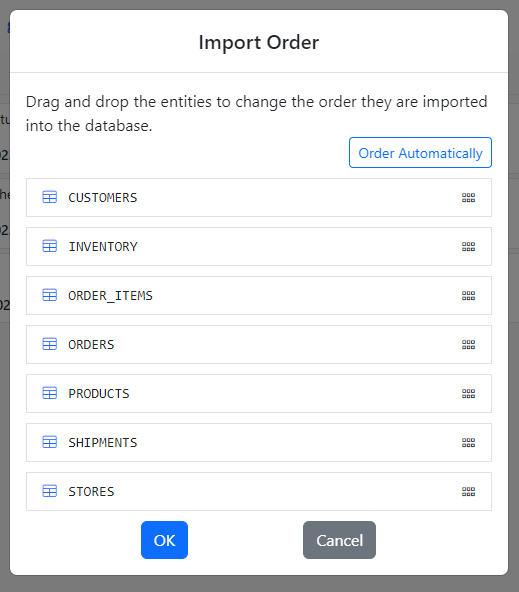
The Import Order Dialog shows up.
The CO schema has the necessary foreign key constraints to automatically infer the import order. Click the Order Automatically button for Gitora to order the entities.
Not all tables have the foreign key constraints to automatically infer the import order though. In such cases, drag and drop the entity names in the dialog to their correct order in the import. Gitora will start the import from the top of the list.
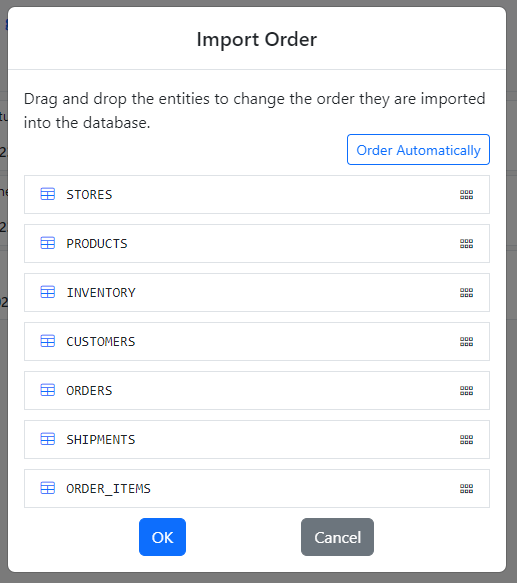
Below is the order of entities after Gitora sorted them automatically. Click OK to accept and save the order.
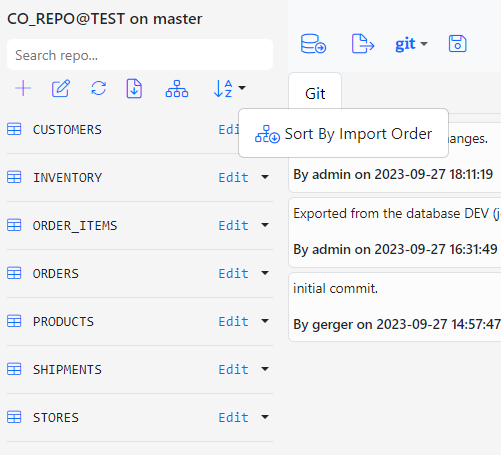
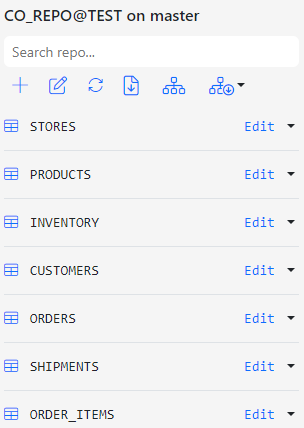
On the main screen, click the first icon on the right in the repo toolbar. Click the Sort By Import Order button to view the entities according to the order they will be imported to the database.
Finally, commit the changes to the import order to the repo.
A Note About the repoConfig.json File
repoConfig.json file is the JSON document that stores the Gitora specific information about your repo. It is part of your repo just like any other file. You should commit it to your repo just like any other file.
Moving Changes to Another Database
In the tutorial Getting Started with Gitora For Data , we clones the repo CO_REPO from the DEV database to the TEST database. The repo was empty then. Now we have data in the repo and even some changes.
Go back to the Home screen and open the CO_REPO in the TEST database. A new browser tabs opens displaying the CO_REPO@TEST repo.
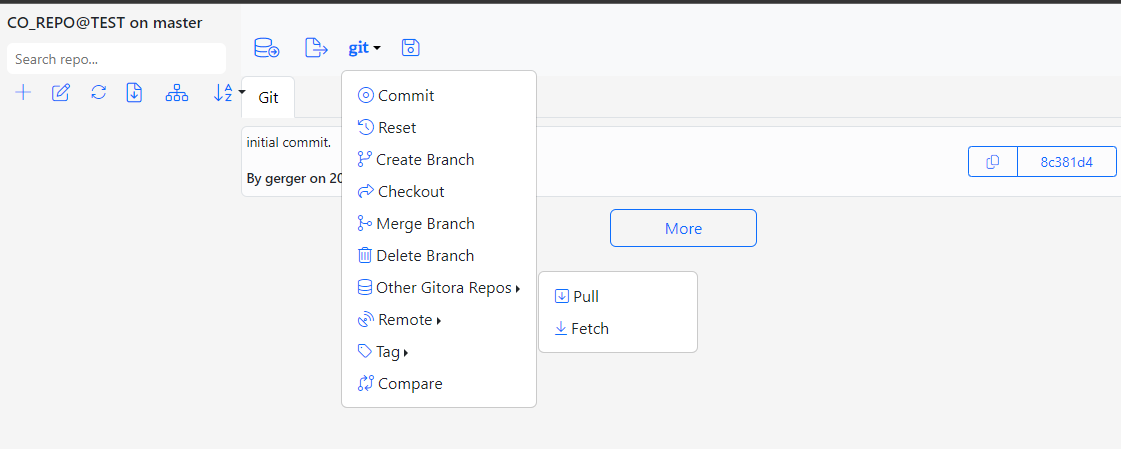
From the top menu select git – > Other Gitora Repos – > Pull
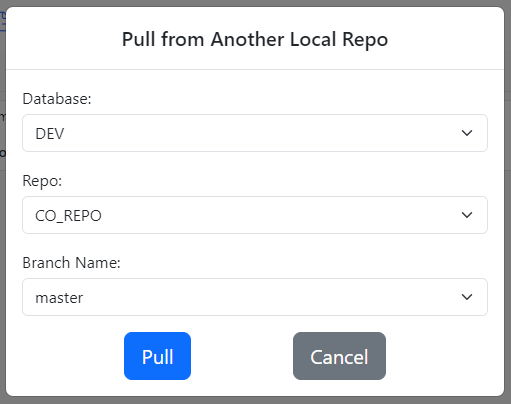
The Pull Dialog shows up. Select the DEV database, the CO_REPO and the master branch from the select boxes respectively.
Click the Pull button to move the changes from the CO_REPO@DEV to the CO_REPO@TEST.
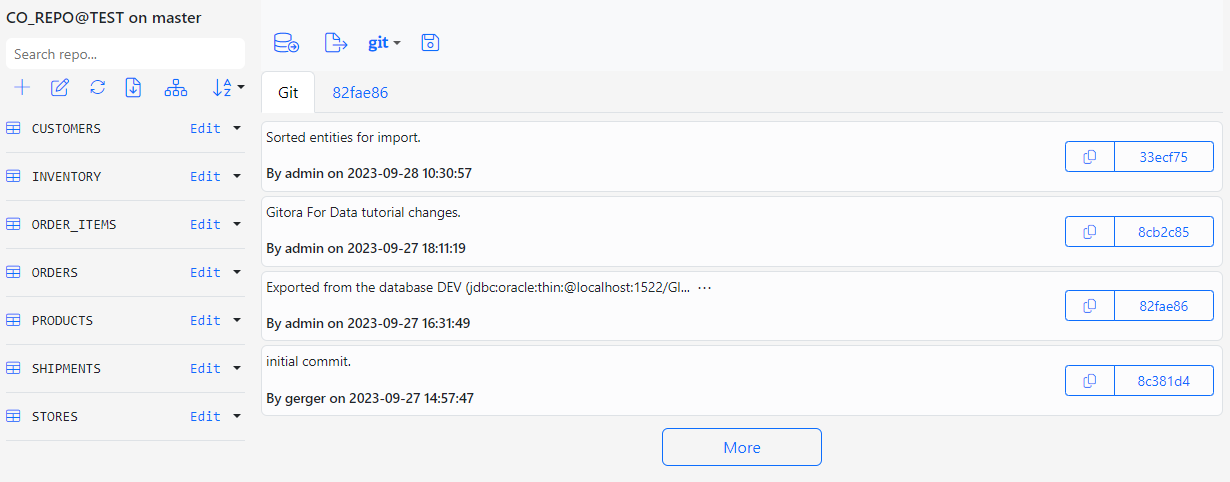
The dialog closes and the Repo app is refreshed with the newly pulled commits and entities.
Importing the Data
Gitora For Data generates insert statements based on the data data in the working directory of the git repo. In other words, you should set the state of the files to the commit id you want to import into the database. In this tutorial, we will import the latest version of the data which is already active in the working directory.
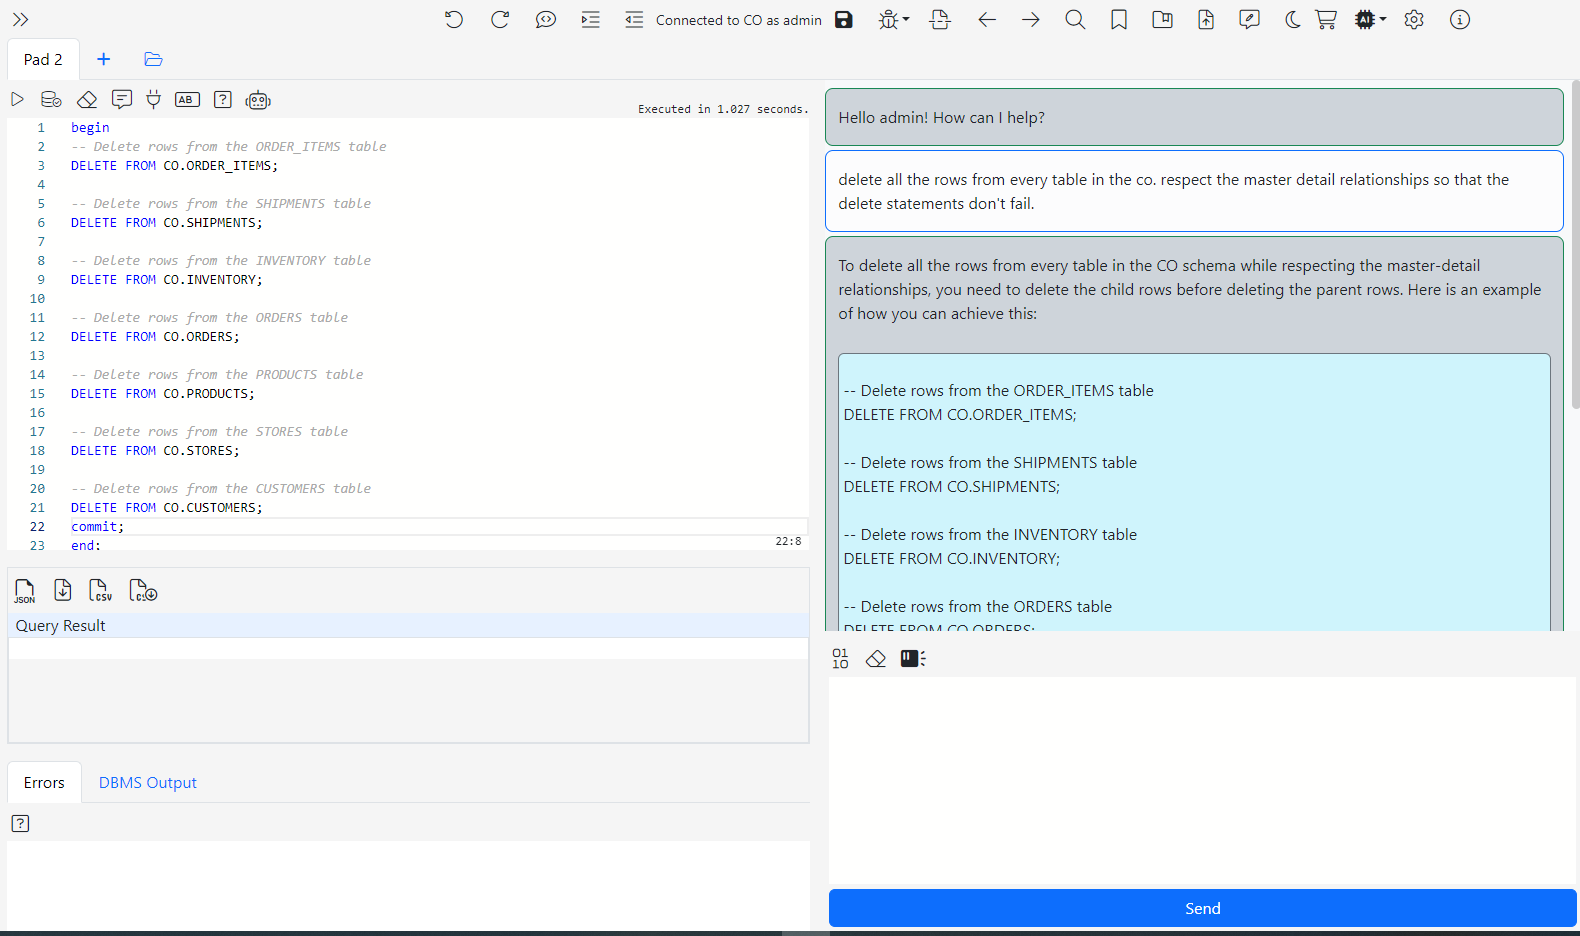
Connect to the CO@TEST database using Gitora PL/SQL Editor. Delete any unwanted rows from the CO schema tables. Since our repo contains all the data we need, we deleted all the rows from the schema by shamelessly plugging our Gitora Editor’s AI Chat feature to this tutorial:
Next, go back to the Gitora For Data app and click the Import button, the second icon from the left.
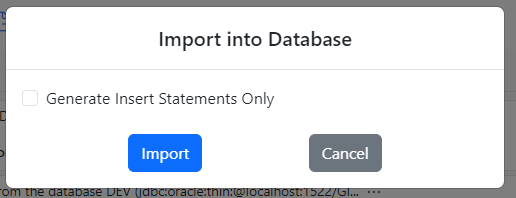
The Import Dialog shows up.
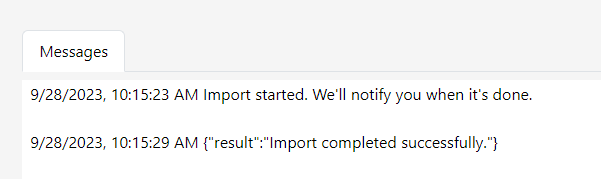
Click the Import button. Gitora will populate the CO schema with the data in the repo and inform you with a notification and a message in the Messages section at the bottom.
In this tutorial we showed how you can use Gitora For Data to:
Export data from a database to a Git repo
Browse and edit the data in the repo and commit the changes.
Move the repo and import the data to another database.
The first time you start Gitora For Data (usually via http://yourdomain/gitorafordata/index.html) the login screen shows up. Enter the default username and password admin/admin and click the Sign In button.
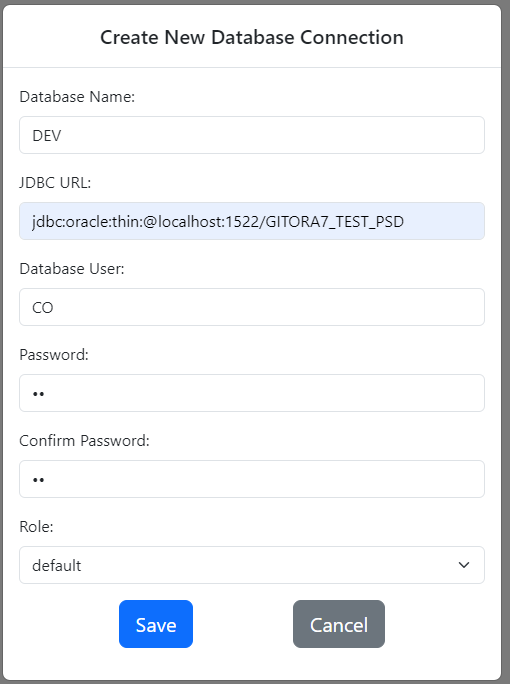
Since there are no databases registered to Gitora For Data yet, the Create New Database Connection Screen will show up.
Gitora will create database sessions using the credentials you enter on this screen so that it can query the tables and perform DML operations. Therefore it is important that the database user you enter has the necessary privileges to perform these tasks. You can add additional users to a database later but you need at least one.
Click the Save button to register your first database.
We will use the Oracle sample schema CO throughout this tutorial.
The Home Screen
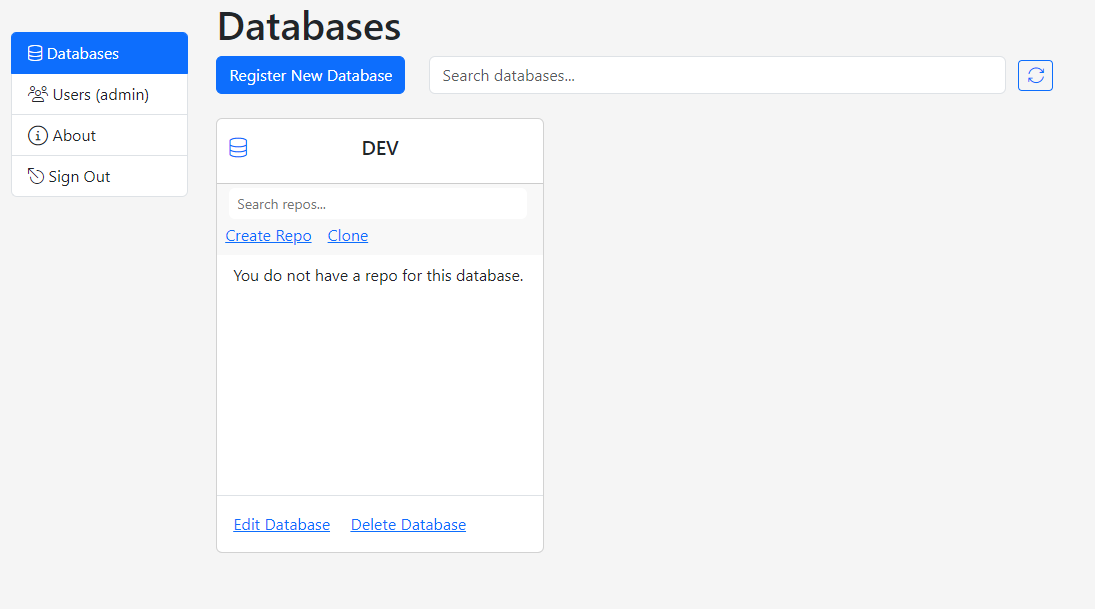
Clicking the Save button takes you to the Home Screen.
The Home Screen is used for the following functions:
Search, register, edit and unregister databases from Gitora.
Create, clone, delete, search and open repos.
Create, edit and delete database users.
Search, create, edit and delete Gitora For Data application users.
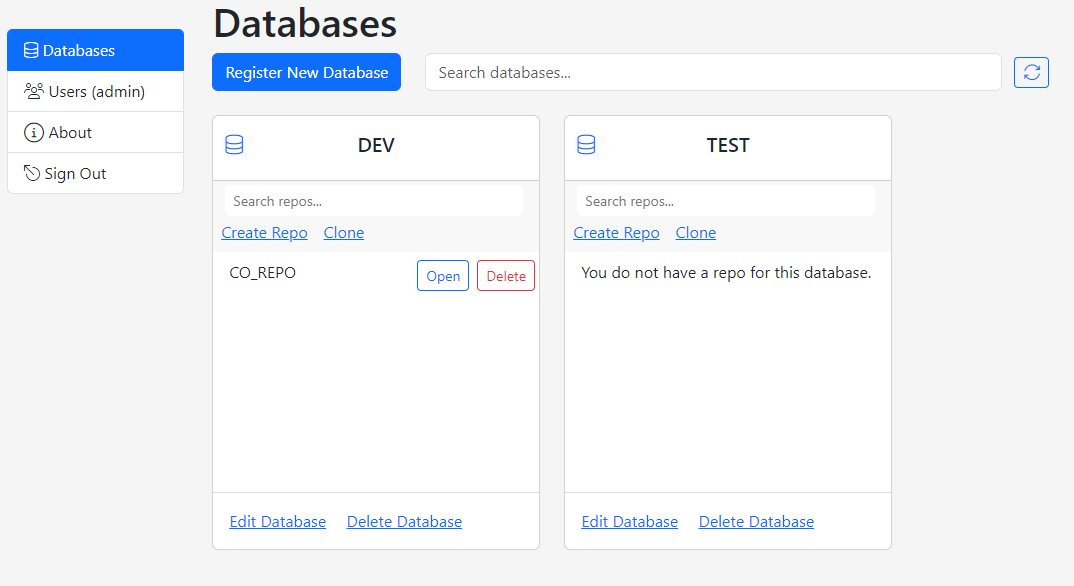
The Home Screen consists of two sections. The navigation column and the main area.
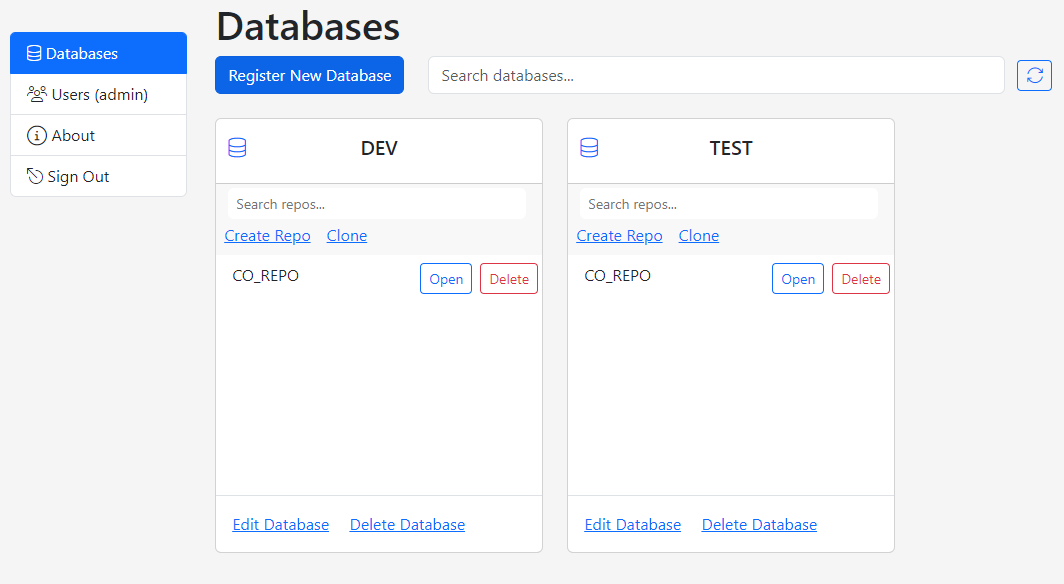
By default, the home screen starts with the Databases tab which lists all the databases that are registered to Gitora.
Creating Your First Repo
In Gitora For Data, each registered database is represented with a Database Card on the home screen. The database card can be used to edit and delete a database as well as to search, create, clone, delete and open Git repos associated with the database.
Our first database does not have a repo yet. So let’s create one.
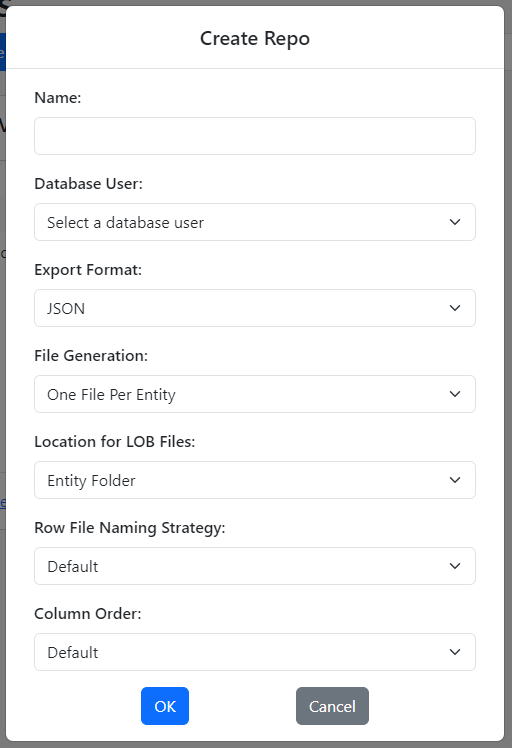
Click the Create Repo link in the DEV database card. The Create Repo dialog shows up.
The dialog displays several fields. Let’s go over them one by one:
Name: This is the name of your repo. It will be the name of the top folder of your Git repo where the .git folder resides.
Database User: Gitora needs to know which database user this repo will connect to so that it can query data from the DEV database.
Export Format: Select the notation the exported data is represented in. (Currently, JSON format is supported. More options will be added based on customer feedback.)
File Generation: Gitora can generate file or files for the rows in a table using the following output strategies:
a) One File Per Entity
Using this strategy, Gitora will create one JSON file that contains all the rows in the table. For example, if you want to export the data from the EMPLOYEES table, Gitora will create a file at EMPLOYEES/EMPLOYEES.json and store all the rows in the EMPLOYEES table in this file.
b) One File Per Row
Using this strategy, Gitora will create a new JSON file for each row in the table. For example, for the table EMPLOYEES it will create files like so: EMPLOYEES/row_0.json, EMPLOYEES/row_1.json, EMPLOYEES/row_2.json etc…
c) One Folder Per Row
Using this strategy, Gitora will create one folder for each row like so: EMPLOYEES/row_0/row.json, EMPLOYEES/row_1/row.json. This option is more suitable if your tables contain LOB columns. For example, if the EMPLOYEES table contained a column named PICTURE_BL, the output would look like the following: EMPLOYEES/row_0/row.json, EMPLOYEES/row_0/PICTURE_BL.png.
Location for LOB Files: Gitora can export LOB data to files. You can choose one of the following options to create the files for LOBs.
a) Entity Folder
Gitora will create the LOB files under the entity folder which is usually named after the table. For example, files for LOB data in the EMPLOYEES table will be created under the EMPLOYEES folder in the repository like so: EMPLOYEES/row_0_PICTURE_BL.png, EMPLOYEES/row_1_PICTURE_BL.png etc…
b) Subfolder under Entity Folder
Gitora will create the LOB files under the lobs directory of each entity. For example the file structure under the EMPLOYEES folder will look like the following: EMPLOYEES/lobs/row_0_PICTURE_BL.png, EMPLOYEES/lobs/row_1_PICTURE_BL.png
c) One Folder Per Row
Gitora will create a folder for each row and place the LOB files of the row under it like so:
Note that, this option can be used in conjunction with the File Generation strategy One File Per Entity. In this case, all rows of the EMPLOYEES table will be in the EMPLOYEES/EMPLOYEES.json file and the files for LOBs will be in folders generated for each row: EMPLOYEES/row_0/PICTURE_BL.png, EMPLOYEES/row_1/PICTURE_BL.png etc…
Row File Naming Strategy: This option determines the strategy Gitora uses to name the files Gitora creates for each row. Gitora can create a file for each row and/or a file for each LOB column in the row. Gitora will use the selected strategy whenever it creates these files.
a) Default
The Default strategy assigns a number to each row starting from 0. The rows are numbered in the order they are received from the Entity’s SQL query. Therefore, it is important to order the data by a column (or columns) that do not change their value over time. By default, Gitora orders rows by their primary key column value(s). If the table does not have a primary key constraint, Gitora uses the first column in the Entity query like so: select * from table order by 1
b) From Primary Key
Gitora generates row file names using the primary key column value(s) of the table. Assuming the primary key of the COUNTRIES table is NAME_TX, the rows Gitora generates will be: COUNTRIES/row_USA.json, COUNTRIES/row_GERMANY.json etc…
Please note that, the primary key values must not contain any characters that cannot be used in file names.
Column Order: Specify the order in which the table columns appear in the JSON document.
a) Default
The columns are ordered as they appear in the SQL query of the Entity. For example, if the query for the COUNTRIES entity is “select region, name from countries” then the JSON document for the country USA will look as follows:
{“region”:”North America”, “name”:”USA”}
b) Alphabetically
As the name of the option suggests, the columns will be ordered alphabetically in the JSON document. For the same query as above, the JSON document will be as follows:
{“name”:”USA”, “region”:”North America”}
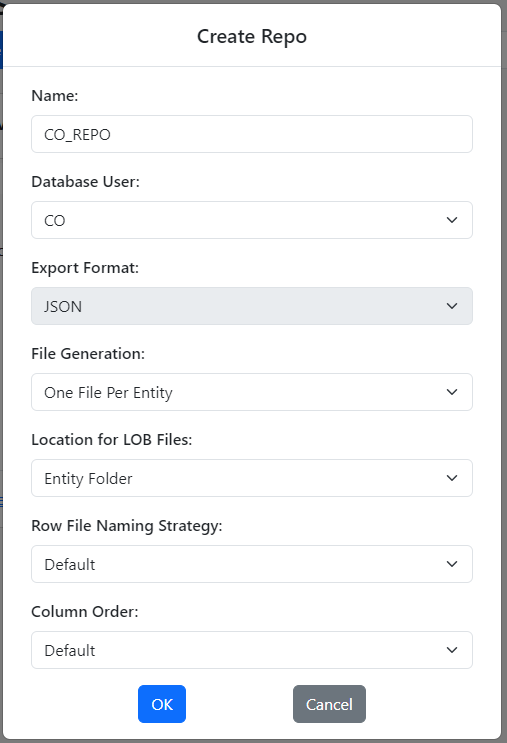
Below are the values for each field for our first repo:
Click OK to create your first repo.
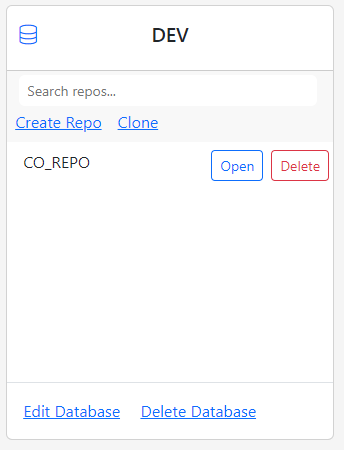
The database card for DEV database shows the first repo you created.
Working with a Repo
Clicking the Open button opens a new browser tab and takes you to the Repo App where the actual stuff happens. Therefore, the repo maintenance deserves its own tutorial. Click here to learn how you can edit a repo, export data to a repo, perform Git operations on the data and finally import your data back to a database.
Deleting a Repo
Click the red Delete button next to a repo to remove it and its contents. Select Yes to confirm and your repo will be deleted.
Cloning a Repo
The Clone button in the Database Card clones a repo and associates the clone with a database.
Although you can clone a repo and associate the clone to the same database, it makes more sense to clone a repo and associate it to a new database. This is how you can move your data from one database to another using Gitora For Data.
To achieve this, let’s create another database first.
Click the Register New Database button and repeat the steps you followed to register your first database. It goes without saying that you should use a different name and JDBC connection string for the new database.
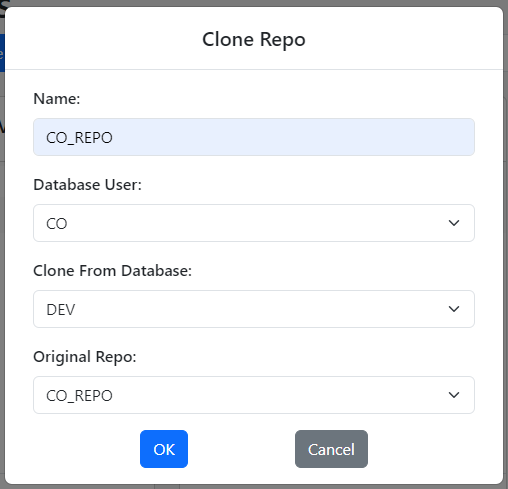
Click the Clone button under the TEST Database Card. The Clone Repo dialog shows up.
Fill out the fields as follows:
Name: Enter a name for your new repo. Since we are cloning the CO_REPO repo, it makes sense to name this repo CO_REPO as well.
Database User: Specify the database user Gitora should use to perform export/import functions for this repo. Since this repo manages data in the CO user, it makes sense to select the CO user.
Clone From Database: We want to clone the CO_REPO from the DEV database to the TEST database, so select the DEV database in this select box.
Original Repo: Select the repo you want to clone from the DEV database. In our case, this is the CO_REPO.
Click the OK button to clone the repo.
The TEST database card shows the cloned repo.
Unregistering a Database
Click the Delete Database button on a database card and select Yes to confirm to remove the database and all its associated repos from Gitora For Data.
Editing a Registered Database and Its Users
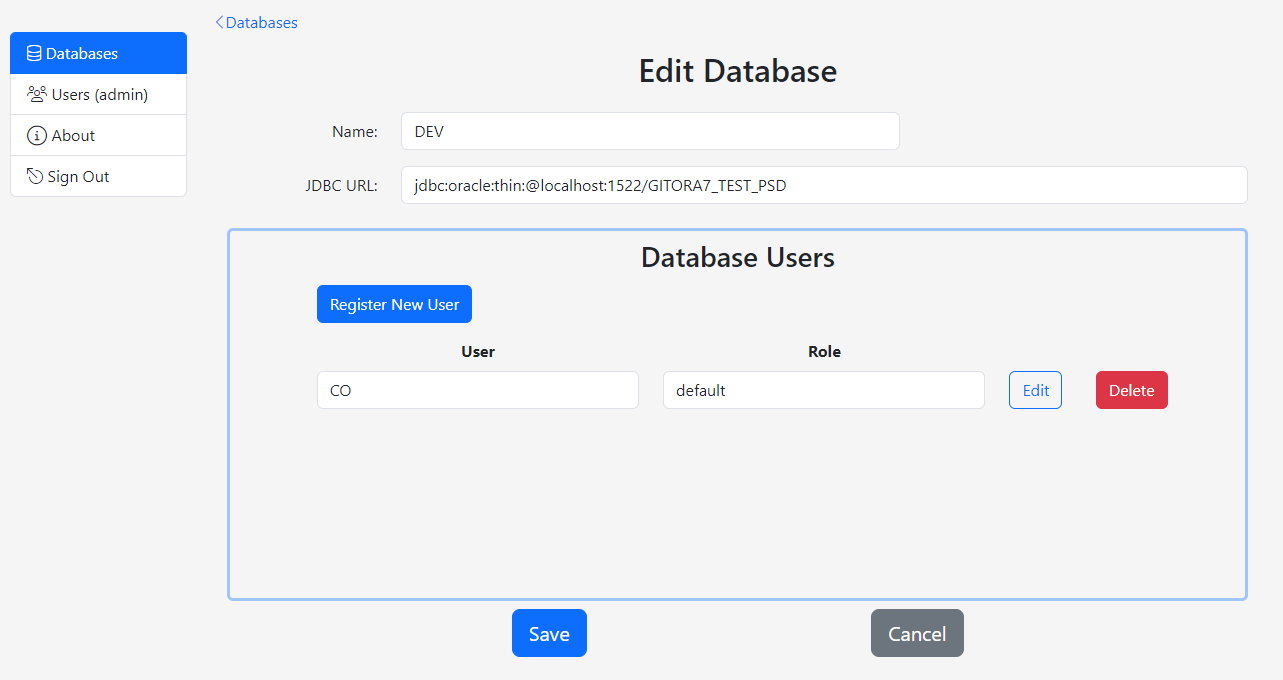
Click the Edit Database button on the database card. The Edit Database screen shows up.
Use this screen to edit the database name and the JDBC URL to connect to the database.
Use the Register New User button to add additional credentials to connect to the database. Use the Edit and Delete buttons to update and remove the existing credentials respectively.
Working With Gitora For Data Users
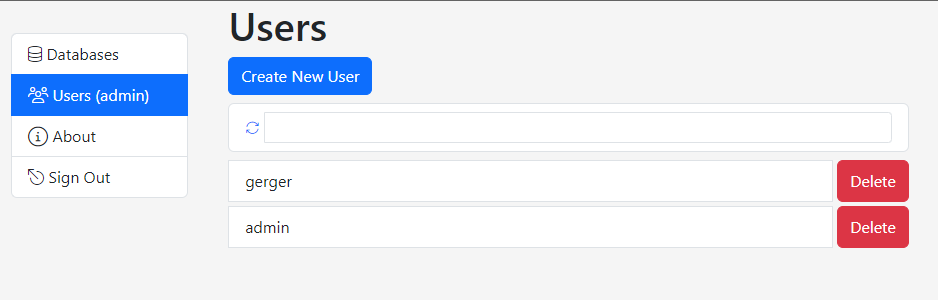
Click the Users tab to work with the application users.
Use the Create New User and Delete buttons to add or remove a user respectively. Click on a user to change its password.
Generating and Using API Keys to work with the Gitora For Data API
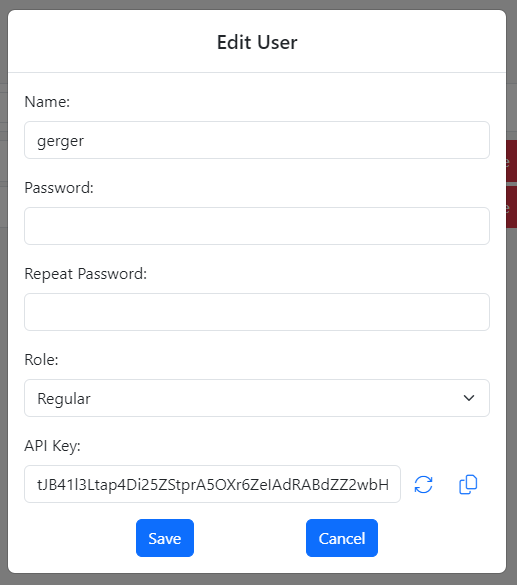
The Edit User screen is also where you can generate and update a user’s API key. You need a valid API key to be able to work with the Gitora For Data API.
Click the refresh button to generate a new API key. Generating a new key, invalidates the existing key of the user. Click the copy button to copy the key to your clipboard.