This document explains the core concepts in Gitora and how developers can use them to control the revisions they make to their Oracle database objects.
Gitora enables developers to perform regular version control tasks on the source code of their applications. Gitora supports every database schema object. It can perform Git commands on objects that can be created using the CREATE OR REPLACE command, namely; Packages, Views, Procedures, Functions, Triggers, Types and Synonyms. It can track every DDL performed on other database objects such as tables, indexes etc…
Behind the scenes, Gitora seamlessly integrates with Git, the prominent distributed version control system used by millions of developers worldwide. Gitora supports the following Git operations on the source code it manages:
- Reset
- Create Branch
- Change Branch
- Merge Branch
- Fetch
- Pull
- Push
Gitora Web App
Gitora has both PL/SQL API’s and a web application to help developers manage their PL/SQL code using Git. Using Gitora Web App developers can:
- Perform the supported version control functions using a point&click interface.
- Check out database objects for editing
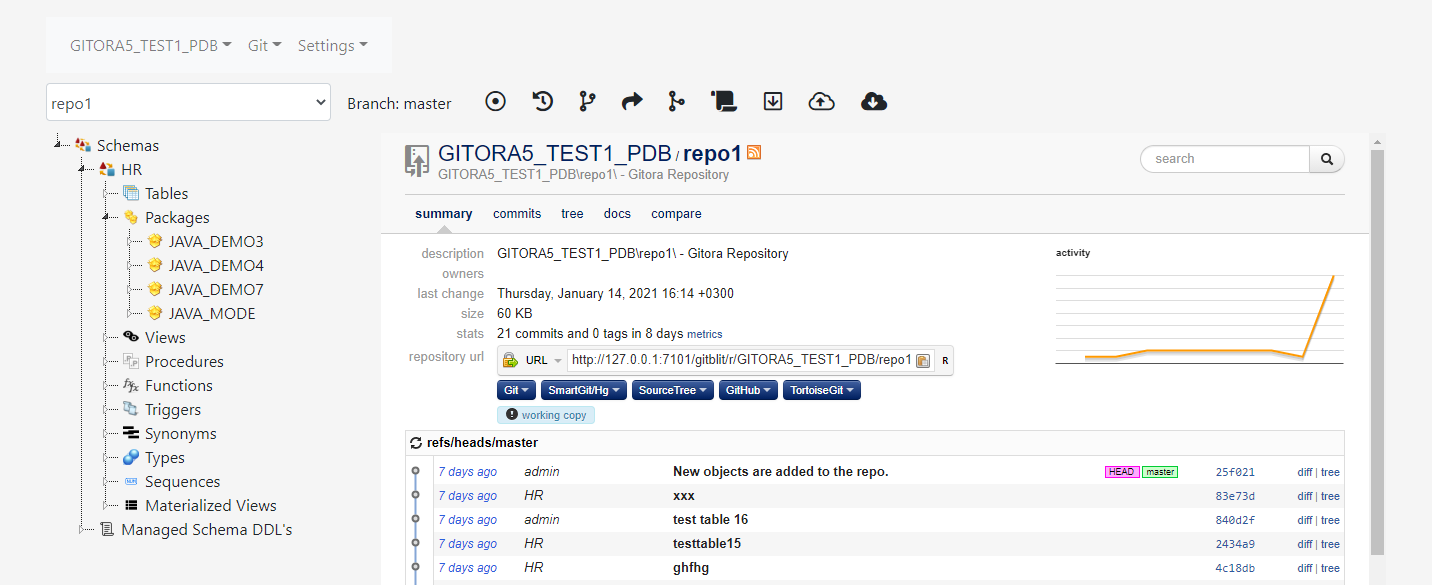
- Browse the source code in the Git repository
- Manage Git repositories.
- Manage users
Creating A Version Control Repository
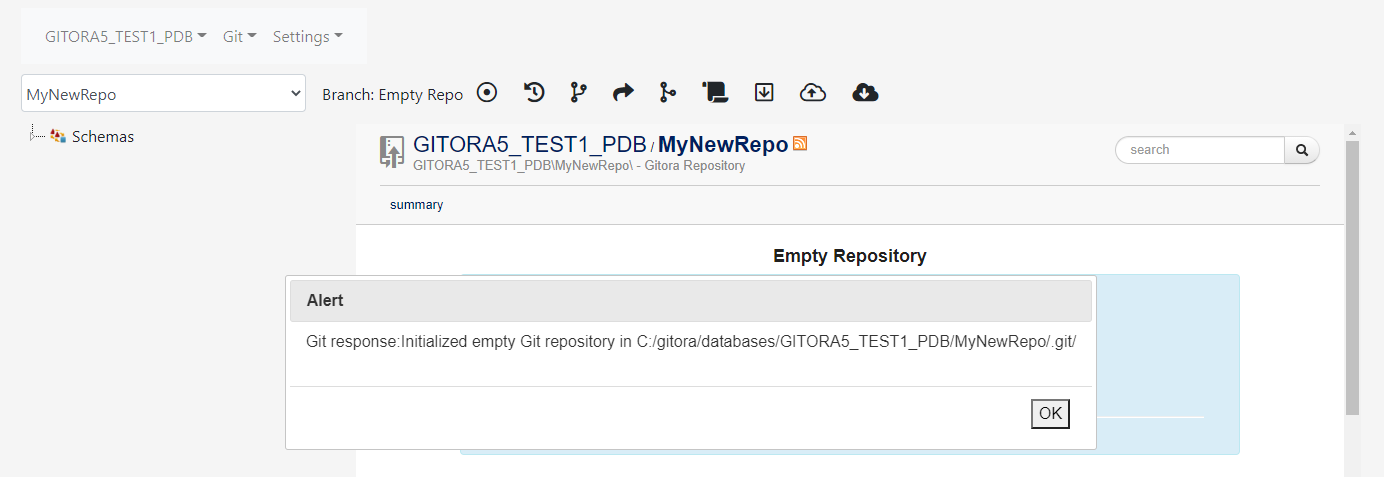
Open Gitora Web App and select Git->Repo-> New Repo from the menu bar. The Create a New Repo Dialog shows up.

Enter a name for your repository (A Gitora repository can contain PL/SQL objects from any database schema.) Click Save. Click OK in the Alert Box which shows the message received from Git. Note that the Gitora Web App makes the new repository you created the active one and the repository viewer focuses on it.
Adding Database Objects to a Gitora Repository
In order to be able to perform version control tasks with a database object, it must be added to a Gitora repository.
To add database objects to a Gitora repository, select Git-> “Add/Remove Objects” item from the menu bar.
The “Add or Remove Database Objects” Dialog shows up.
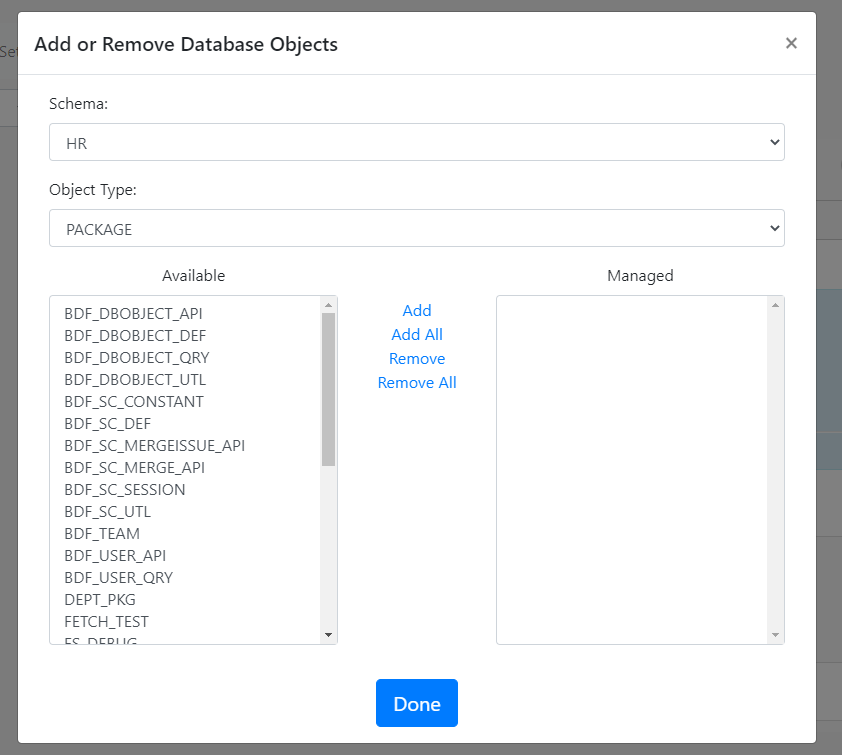
To add a database object to the Gitora repository, select the schema the object is in. Next, select the type of the object. Gitora supports the following object types: Table, Procedure, Function, Package, View, Trigger, Type, Synonym, Sequence and Materialized View.
Finally, select one or more objects from the list of available ones and add them to the list of managed objects. Add as many objects of different types as necessary.
A Note About Adding a Large Number of Objects
The Dialog supports adding tens even hundreds of objects at once, using the Add All button. However, this may take time because Gitora will extract the DDL of these objects and create files. If the number of objects you are adding to the repo at once is very high, the browser may prompt you that the application is unresponsive or the session in the Tomcat Server might expire (in about an hour).
If you are building a large Git repo, we recommend that you either add the objects in chunks or use the Gitora API’s.
Click “Done” to close the dialog.
A Gitora repository can manage database objects from multiple schemas. To add database objects from another schema simply change the schema name selected in the dialog’s select box and continue as described above.
Collaboration vs. Parallel Development
Unlike middle tier (Java, PHP etc…) or client side programming language code units (JavaScript, Objective-C etc..) PL/SQL code units do not reside in private files on a developer’s computer. They are globally available to every developer who has access to the database with the appropriate privileges. Therefore, PL/SQL developers mostly collaborate on the same PL/SQL code units (Packages, Procedures, Functions etc…) using a check-out mechanism to prevent themselves from overriding each other’s modifications.
When working together, developers of other programming languages have a different approach. They work on the same logical code unit but they always edit different physical copies of the same logical code unit. In most cases it is impractical for PL/SQL developers to set up their own private environments in which each developer has a private copy of the PL/SQL code units she is working on. Therefore, Gitora features a check-out mechanism to better fit into the regular workflow of PL/SQL developers. This enables a team of developers to collaborate on one branch of the application without stepping on each other’s toes.
More importantly however, Gitora also supports a workflow in which each developer works in her own environment and with her own database objects (similar to a middle tier or client developer). This way, developers can freely modify the same logical code units (but different physical copies) and merge their changes at a later point in time.
Editing a Database Object Managed by Gitora
Developers may continue using their favorite PL/SQL editor to edit database objects managed by Gitora. Since Gitora is implemented at the database level, it works with any editor.
Once a database object is in a Gitora repository, Gitora will only allow changes to it from database sessions which have a logged in Gitora user and if the database object is not already checked out by another Gitora user.
Use the following API’s in the API_GITORA package to sign in to Gitora with your Gitora user name and password.
login(in_user_cd varchar2, in_password_tx varchar2) :signs in to Gitora with a valid Gitora user name and password.
logout;signs out of Gitora
No Sign In Development
Gitora 5 can be configured to recognize Oracle Users as valid Gitora users. This eliminates the need to sign in to Gitora using the PL/SQL API above. We recommend this approach in environments where every developer has her own Oracle User.
To achieve this, log in to Gitora as an admin. Next, click the [Database Name]-> Users menu item from the menu bar. The Manage Users page shows up.
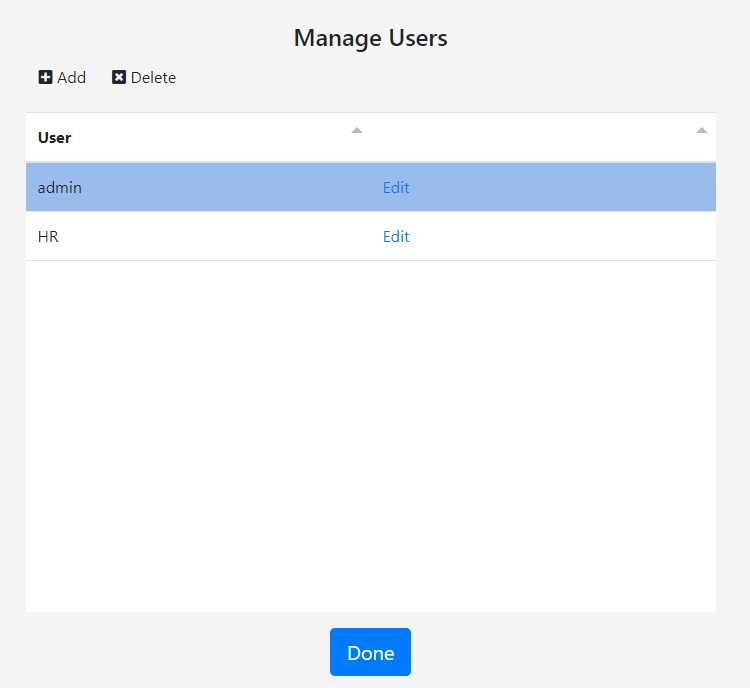
Click the Add button on the page. The Add User dialog shows up.
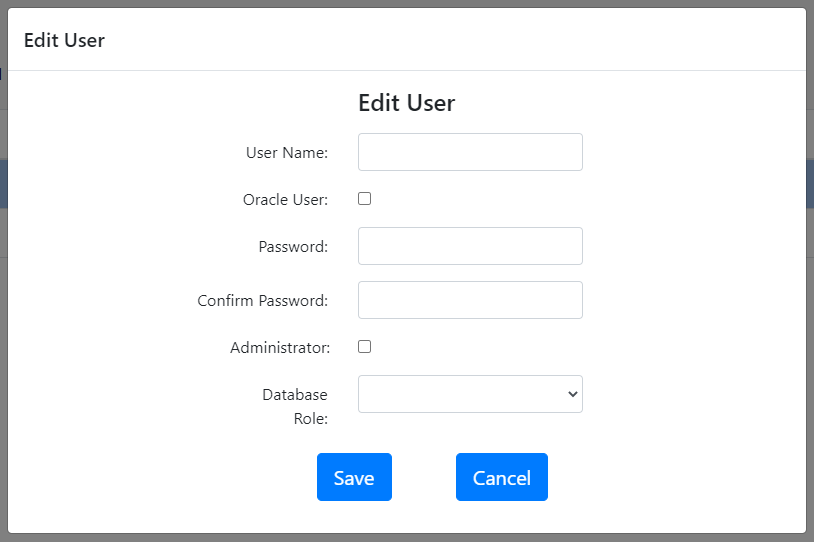
Enter the Oracle username to the User Name field (LISA in the screenshot). Check the Oracle User checkbox. The password fields will be disabled. The user will use her Oracle credentials to log in to Gitora. If you are using Gitora Enterprise, select a database role for the user, as well.
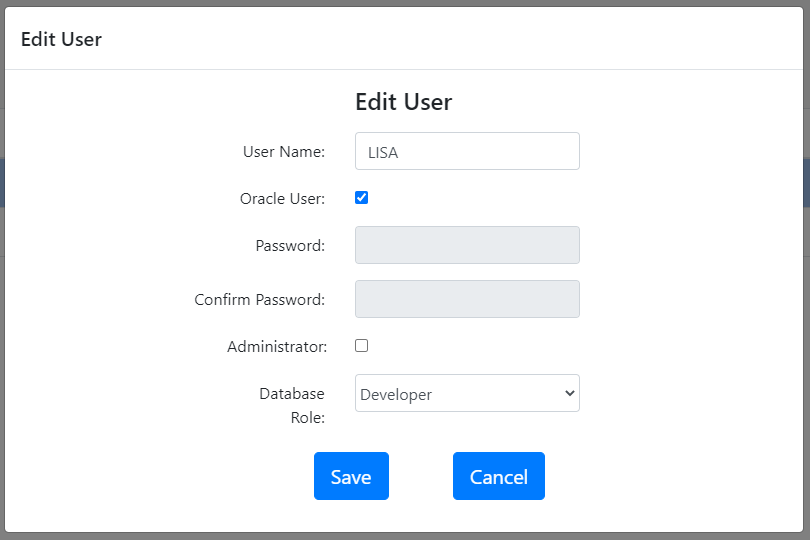
Click the Save button.
From this point on, the user (LISA in the example) can log in to the Gitora application with her Oracle username and password. She also doesn’t need to sign in to Gitora first to modify database objects managed by it because Gitora will recognize her as a valid user.
When a developer saves a PL/SQL object to the database, Gitora automatically attempts to check out the object if the database session has a logged in Gitora user. If the object is already checked out by another developer, Gitora prevents the save with an appropriate error message.
Developers may also use the Gitora Web App to check out a database object from the navigation tree by right clicking it and selecting the check out menu item from the pop up menu.
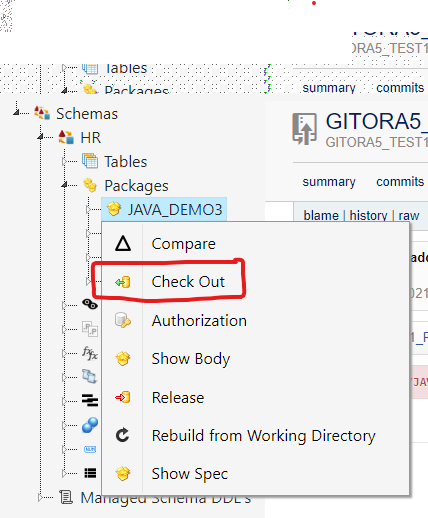
Gitora Web App presents a green lock icon on database objects checked out by the logged in developer and a red lock icon on database objects checked out by other developers.
Committing Database Object Modifications
At any time the developer can view the list of objects she checked out from the “Git -> Commit” menu item.
Alternatively, she can use the “Commit ” icon in the toolbar to access the same dialog.
The “Commit Changes” page has two tabs. The “All Objects” tab shows the list of every database object in the current repository that is checked out by every developer. The “My Objects” tab shows only the objects the logged in developer checked out.
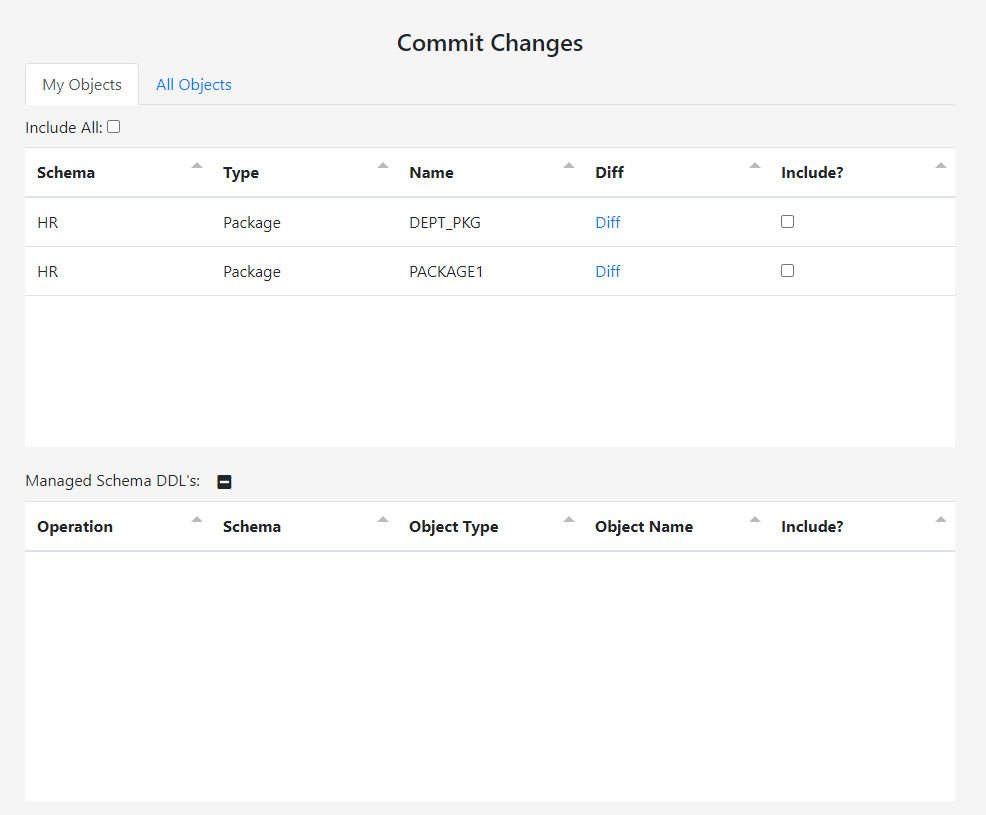
The developer can review changes made to each object by clicking the associated Diff link. She can also choose to include/exclude each object from the current commit by using the Include? checkbox.
The page has a section named “Managed Schema DDL’s”. We’ll talk about this section in a different blog post.
Gitora requires a developer to enter a short description of the changes she is commiting to the Commit Changes text area. This description comes in very handy when going over the history logs.
Clicking the Commit button commits the selected objects to the Git repo.
Once the Git commit is finished, Gitora displays the message it retrieves from the Git server. This message gives a summary of the updates made to the Git repository.
After the commit completes, objects included in the commit are automatically released and are no longer checked out by the developer.
Releasing an Object
If the developer wants to remove her edit lock on an object she checked out, she can do so by right clicking the object in the navigation tree and clicking the Release menu item. Please note that this will cancel all her changes to the object and the object will revert back to the latest state it is in on the active branch of the repo.
Resetting to a Commit ID
If a developer wants to cancel changes in an application’s current branch and bring it to a state it was at a certain point back in time, she can do so by using the Git->Reset menu item.
The “Reset” operation needs a valid Git Commit ID to function. The Git gives a unique ID to each commit issued by a developer. The developer can browse the Git repos to determine the Commit ID she wants the application to revert back to.
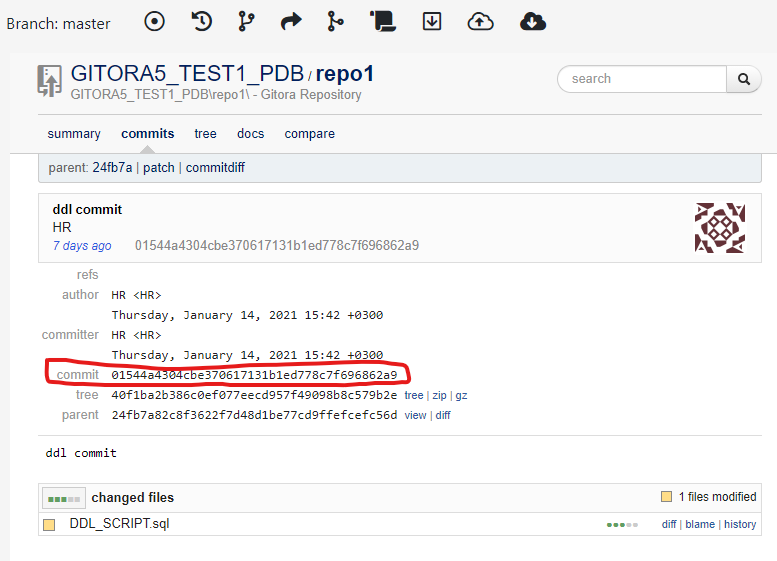
To move back the application to a commit ID, click the “Git -> Reset” menu item. The “Reset” dialog shows up. Paste the Commit ID value to the field named Commit ID and click the“Reset” button. The code base goes back to the state it was at that Commit ID and Gitora displays the message it received from the Git Server. The code in the database is also updated.
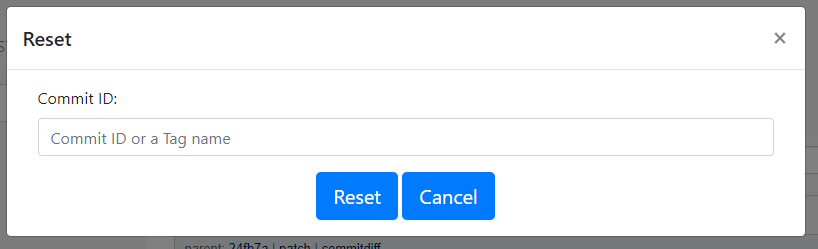
As a shortcut, you can revert to the previous state of the repository by entering HEAD@{1} as the Commit ID.
Please note that the reset command (just like every other command in Gitora) will only update the soft objects in the database. Soft objects are defined as objects that work with the CREATE OR REPLACE command. Therefore, it will not change any table, sequence or materialized view in the database.
Creating a Branch
Branching is a very powerful feature of version control systems that enables developers to work on multiple versions of a code base easily. For example, a developer can work on the master branch to fix bugs that are reported from the production environment and release maintenance versions while developing a new feature in the dev branch. The deployed new maintenance versions from the master branch never include the code written in the dev branch.
To create a new Branch click the “Git -> Create Branch” menu item. A dialog shows up.
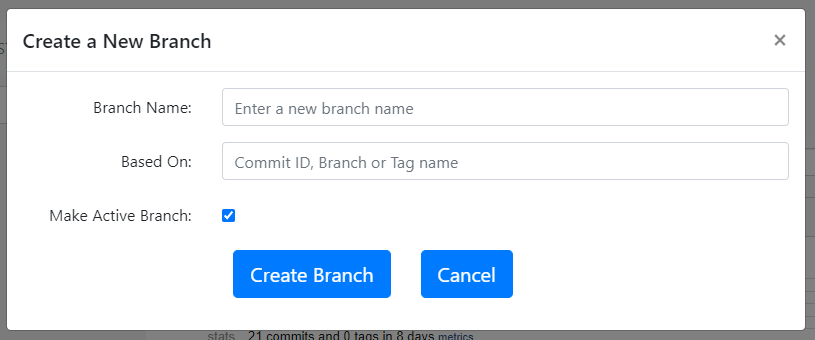
Enter a name for the new branch. Enter the name of another branch, a tag name or a Commit ID as the starting point of the new branch. Keep the checkbox checked if you want to make this branch the active branch in the database.
Click the “Create Branch” button to create the new branch. Once it is created, the code base automatically switches over to the newly created branch if the Make Active Branch checkbox is checked.
Please note that there must not be any checked out objects in the repository for Gitora to be able to create a new branch.
Changing Branches
In order to change the current branch of the repository, open Gitora Web App, select a repo from the main select box and select the “Git -> Change Branch” menu item. A dialog shows up.
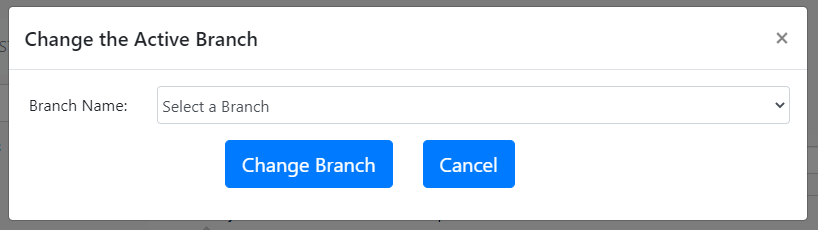
Select the branch to switch to and click the “Change Branch” button. The code base in the Oracle Database gets updated to show its state in the selected branch. Please note that there must not be any checked out objects in the code repository for Gitora to be able to switch to another branch.
Important Note: Git commands executed by Gitora only update soft objects. Soft objects are defined as database objects that work with the CREATE OR REPLACE command. Therefore Gitora does not change any tables, sequences and materialized views in the database.
Merging a Branch to another Branch
Creating and switching between branches would not be meaningful unless Gitora also enabled merging of a branch to another. For example, once the development on the dev branch is finished, developers should be able to move the changes to the master branch of the code base. This is called a merge.
To start a merge click the “Git -> Merge” menu item. A dialog shows up asking the source branch for the merge operation. The destination branch is always the current branch the code base is on.
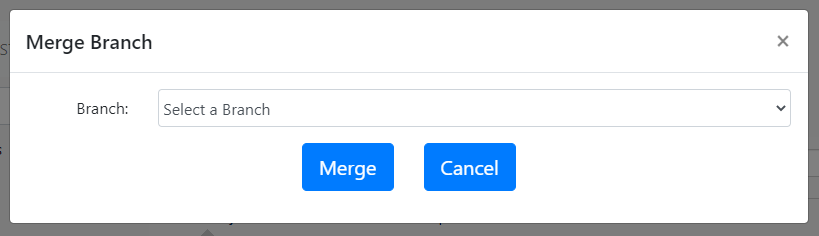
Click the “Merge” button to start the merge operation.
During the merge operation, Gitora carries over the changes made in the source branch to the destination branch. In some cases Git may not be able to figure out the right operation to perform to bring over a particular change. These cases are called conflicts.
A conflict may occur if;
- An object deleted in the source branch is modified in the destination branch.
- An object is modified in the source branch and in the destination branch, and Git cannot consolidate these modifications. (For example, in both branches the same line of code in a PL/SQL procedure is modified. There is no way a version control system can figure out the right way to consolidate these two changes.)
- An object modified in the source branch is deleted in the destination branch.
- A newly created object in the source branch and a newly created object in the destination branch have the same name.
If there is a conflict in a database object after a merge, Gitora does the following in the destination schema:
- It creates the database object in an uncompiled form with changes from both source and destination in it.
- It creates the database object with “$M” (short for my object) suffix in its name which represents the content of the object in the destination branch before the merge.
- It creates the database object with “$T” (short for their object) suffix in its name which represents the object in the source branch.
The developer who started the merge is responsible to resolve the conflicts in the database objects that might occur after a merge operation.
Gitora provides an easy to use merge wizard to the developer so that she can keep track and mark the conflicts as resolved. The merge wizard shows a commit screen after all the conflicts are resolved. If there are no conflicts after a merge operation, the merge wizard does not show up.
Resolving Conflicts in Table, Sequence and Material View DDL’s.
Gitora 5 keeps track of table DDL’s just like it keeps track of soft objects. However, it does not update the database with the new definition of a table during a merge. Yet, a merge conflict might still occur in a table DDL if the table DDL was modified in two different branches.
In such a case, Gitora will show the table in the merge conflict screen. The table name will have a .sql suffix to indicate that the conflict is in a file managed by Git but the database is not affected. Gitora also provides an edit button for the user to edit the DDL text and resolve the conflict.
Until the merge conflicts are resolved, Gitora does not allow developers to modify the code base subject to the merge operation.
Please note that the developer is also responsible to fix the compilation errors that might occur after a merge operation which are different from the conflicts. There might be compilation errors after a merge even if there are no conflicts.