With Gitora 5 users can track changes made to any table’s definition individually.
The way tables work in Gitora is very similar to the way soft objects such as packages, procedures work but there are a few key differences. We’ll go over them briefly.
Adding a Table to a Repo
You can add a table to a Gitora repo just like you add any other object. Simply open a repo from the main select box. Click Git->Add/Remove Object from the menubar. The Add/Remove Database Objects dialog shows up.
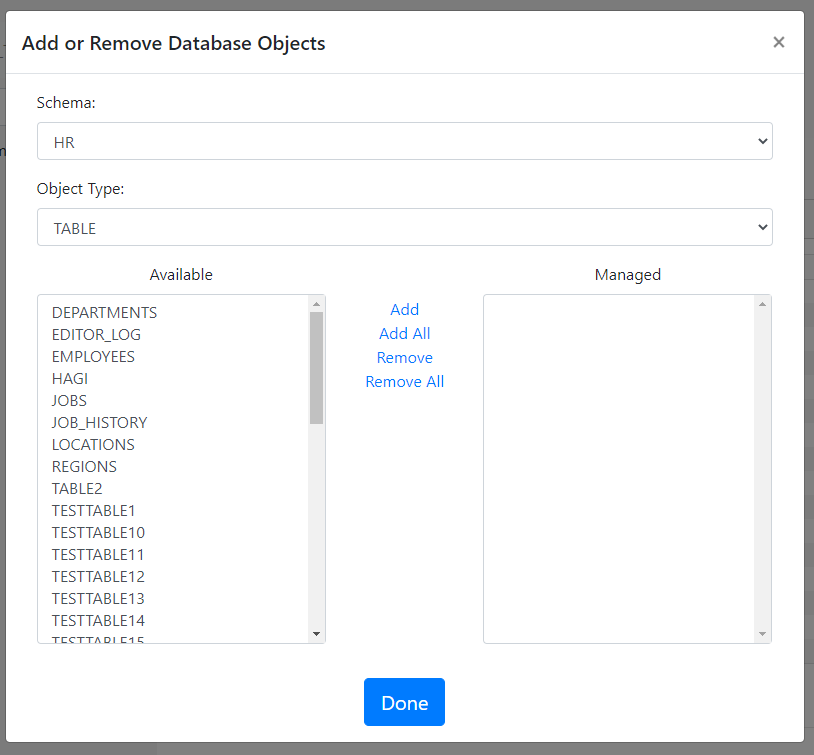
Simply, select, add the tables you’d like to include to the open repo and click the Done button.
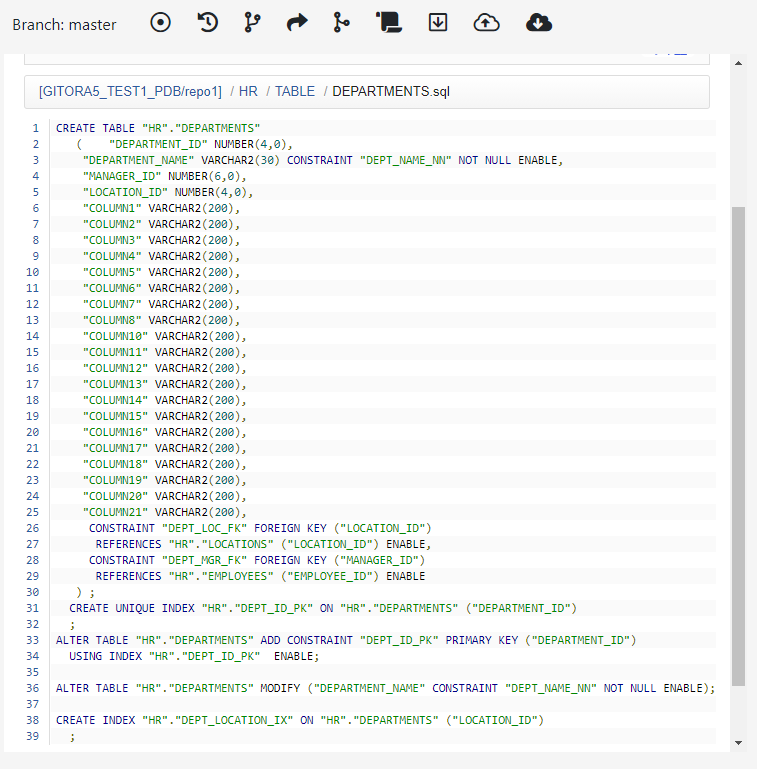
Gitora will generate a DDL script for the table and save it as a file in the Git repo. The DDL script will contain the table’s definition as well as any constraints and indexes created on it.
Making Changes To a Table Definition
The workflow for executing a DDL on a table managed by Gitora is exactly the same as any other object managed by Gitora.
Once a table is added to a Gitora repo, developers must log in to Gitora in their database session to be able to make modifications to its definition. (The table must also be available for checkout for the developer to execute a DDL statement on the table.)
After a developer executes a DDL statement for the table (such as adding a column), Gitora automatically checks out the table for the developer if the table is not checked out by another developer already.
The developer can commit her changes to Git just like she commits any other object in the Gitora app, namely by clicking the “Git->Commit” item in the menubar and including the table in her commit.
Effects of Executing Git Commands on Tables
Executing Git commands such as reset, change branch, merge may change the file that contains the table DDL. The file will contain the correct DDL statement for the current Git commit ID. However, Gitora will not reflect this change in the database. This behavior differs from how Gitora behaves for soft objects such as packages, views, procedures etc… If there are changes, Gitora updates these objects in the database after a Git command is executed.
Sequences and materialized views work the same way as tables.
In Gitora parlance, any object that can be used with CREATE OR REPLACE syntax is called a soft object. Objects such as tables, sequences and materialized views which cannot be used with CREATE OR REPLACE are called hard objects.
Altough one repo can store both hard and soft objects without any issues, we recommend users to store hard and soft objects of a project in separate repos.
Moving Hard Object Changes between Databases
Gitora can move soft objects (packages, procedures, views etc…) between databases with a single click or an API call (enterprise edition only) automatically.
The method described above to track tables is very useful to create schemas from scretch, to track changes over a period of time and see the definition of an object in a previous state. However, it is not very useful to move hard object changes to another database. To achieve this, Gitora has a “Managed Schemas” feature. You can register one ore more schemas to a Gitora repo so that it tracks every hard object DDL statement executed in these schemas. To achieve this, click Git->Add/Remove Managed Schema. Select the schemas you want to manage and click Done.
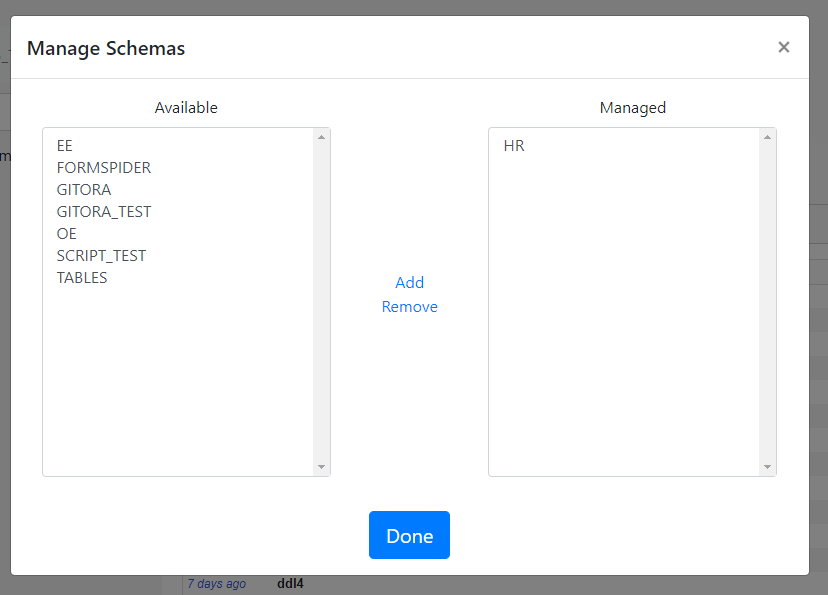
In the picture above, Gitora will track DDL statements executed in the HR user.
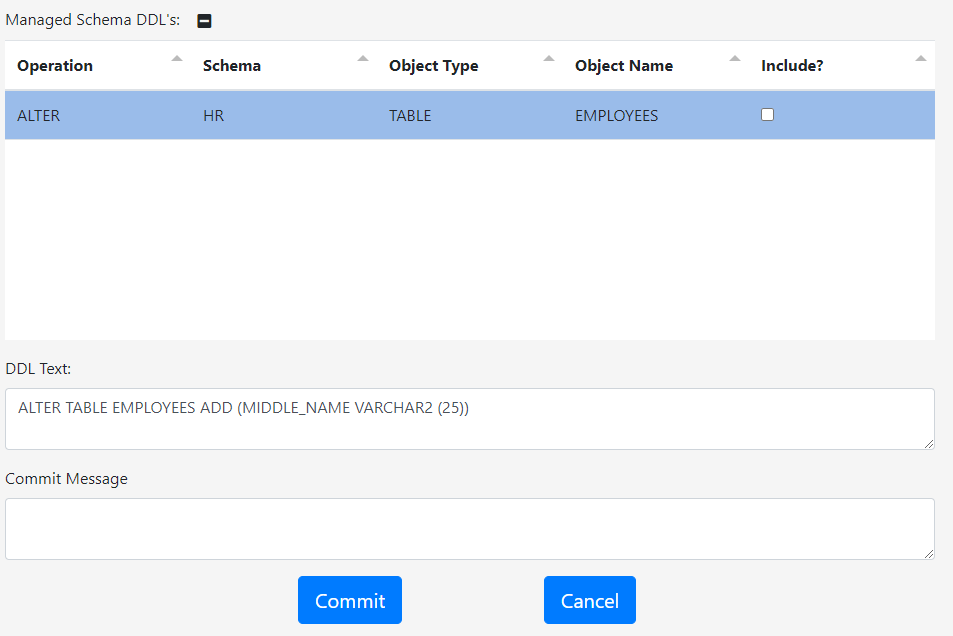
Let’s assume that we execute the following DDL statement in the HR schema:
ALTER TABLE EMPLOYEES ADD (MIDDLE_NAME VARCHAR2 (25));
DDL statements show up in the “Managed Schema DDL” section of the Commit Changes page.
Once committed, these DDL statements show up in a file named “Managed Schema DDL’s” in the Gitora main screen. Please note that the DDL statement above shows up at the end of the document after it is committed.
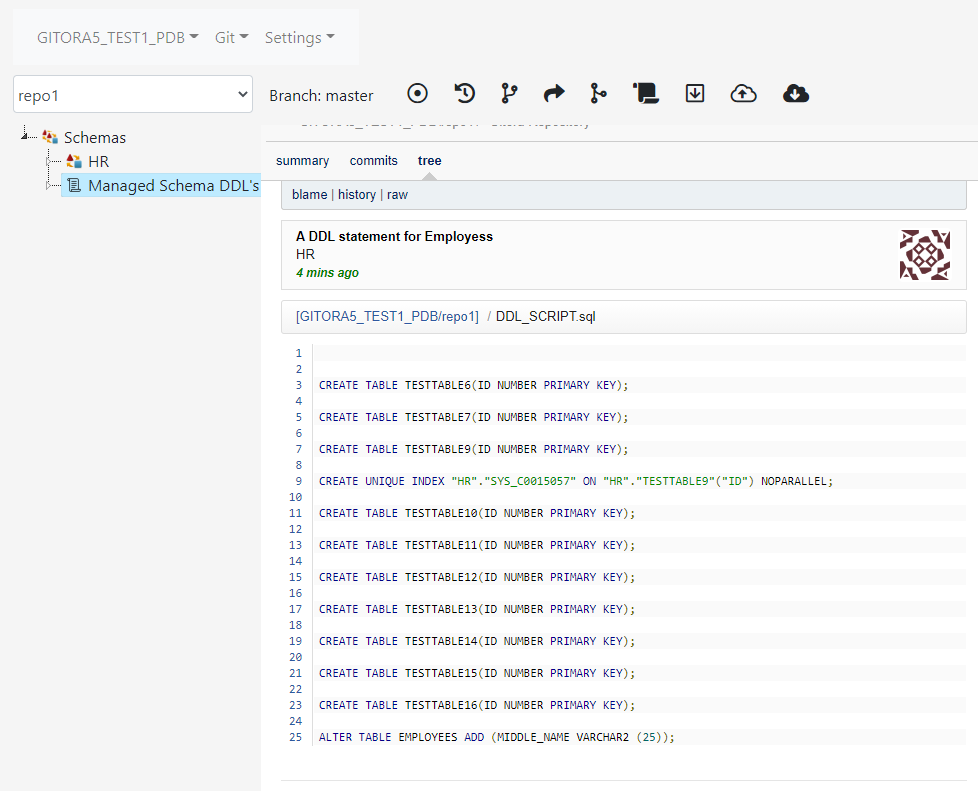
As developers commit their DDL statements, they are added to this file. Gitora users can edit this file by clicking Edit in its right click menu.
If we pull this repo (say from DEV to TEST) the “Managed Schema DDL’s” will also be pulled.
Once the pull is completed, the DDL statement we executed in DEV is now in TEST but not yet executed.
To determine which DDL statements we need to execute, we simply need the diff between the Managed Schema DDL’s file’s current state and previous state before the pull. We get this diff by right clicking the Compare button in the right click menu of the Manage Schema DDL’s file.
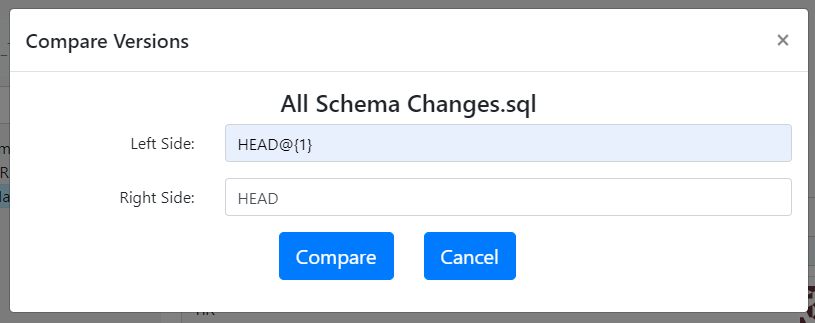
The Compare Versions dialog shows up. Left Side and Right Side fields accept any Git commit ID. Clicking the compare button shows a screen which highights the differences between the two versions of the Manage Schema DDL’s file.
HEAD@{1} is a Git shorthand that represents the previous commit ID (before the pull) and similarly HEAD represents the current commit ID (after the pull). Clicking the Compare button gives the following result:
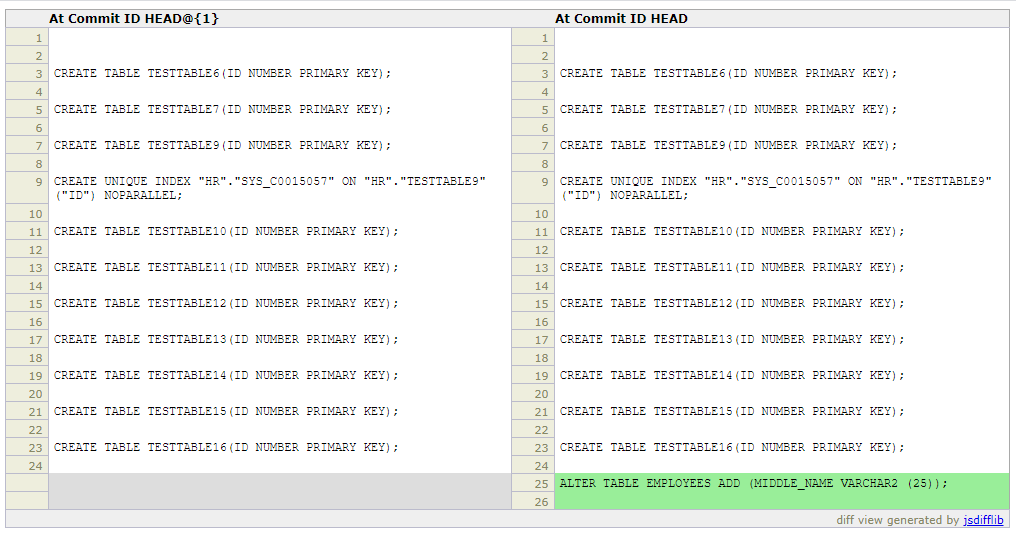
The DDL statement we need to execute in TEST to sync it with DEV is highlighted in green.
Any Gitora repo can manage any number of schemas. However, we recommend users to create a separate repo to manage schemas of a project.